So, you’ve decided you want to do your own digitizing. Now all you need to do is find the right digitizing software for you and your business!
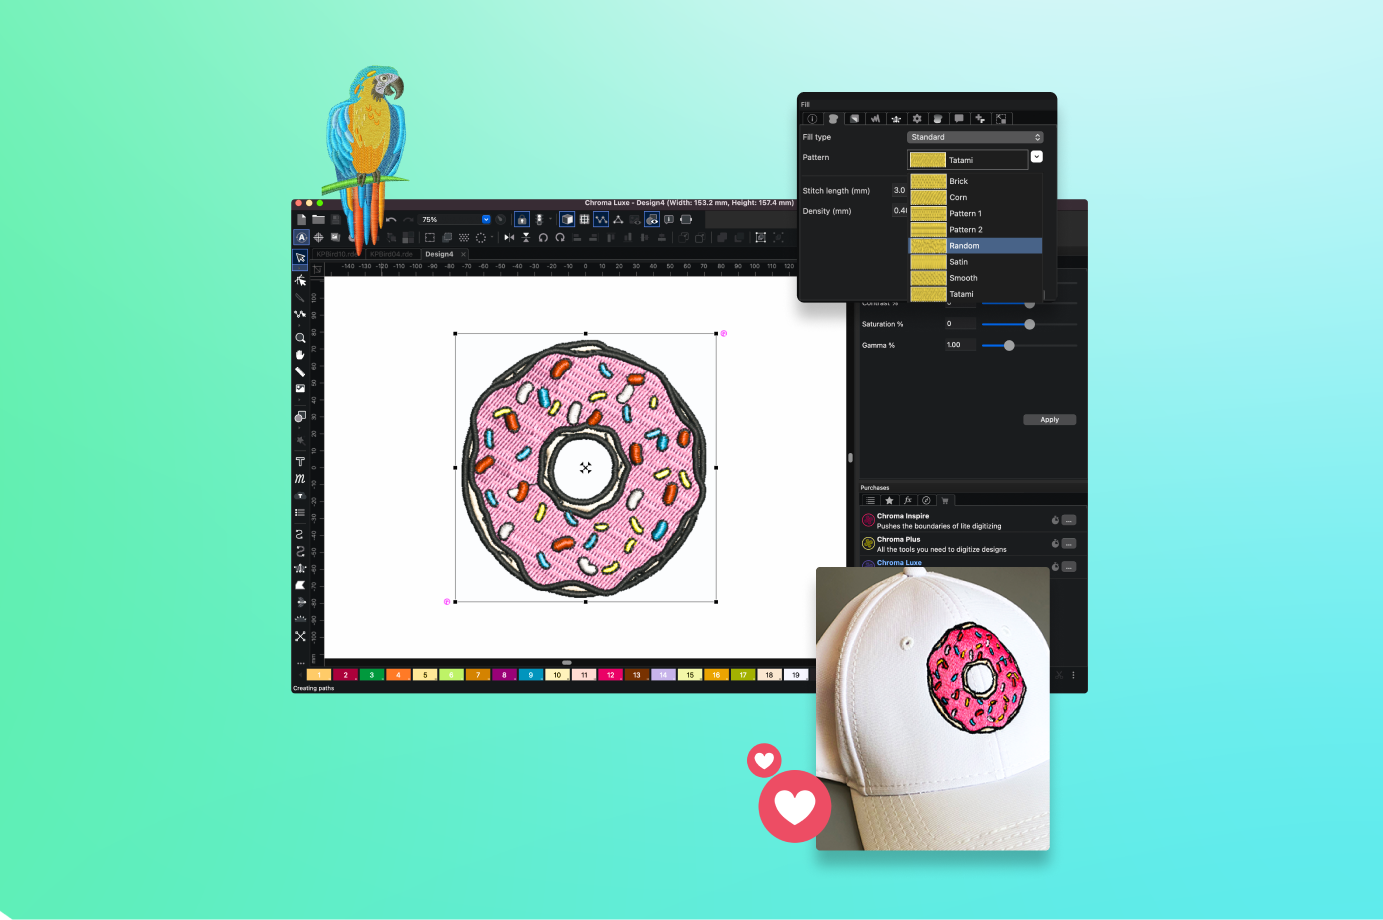
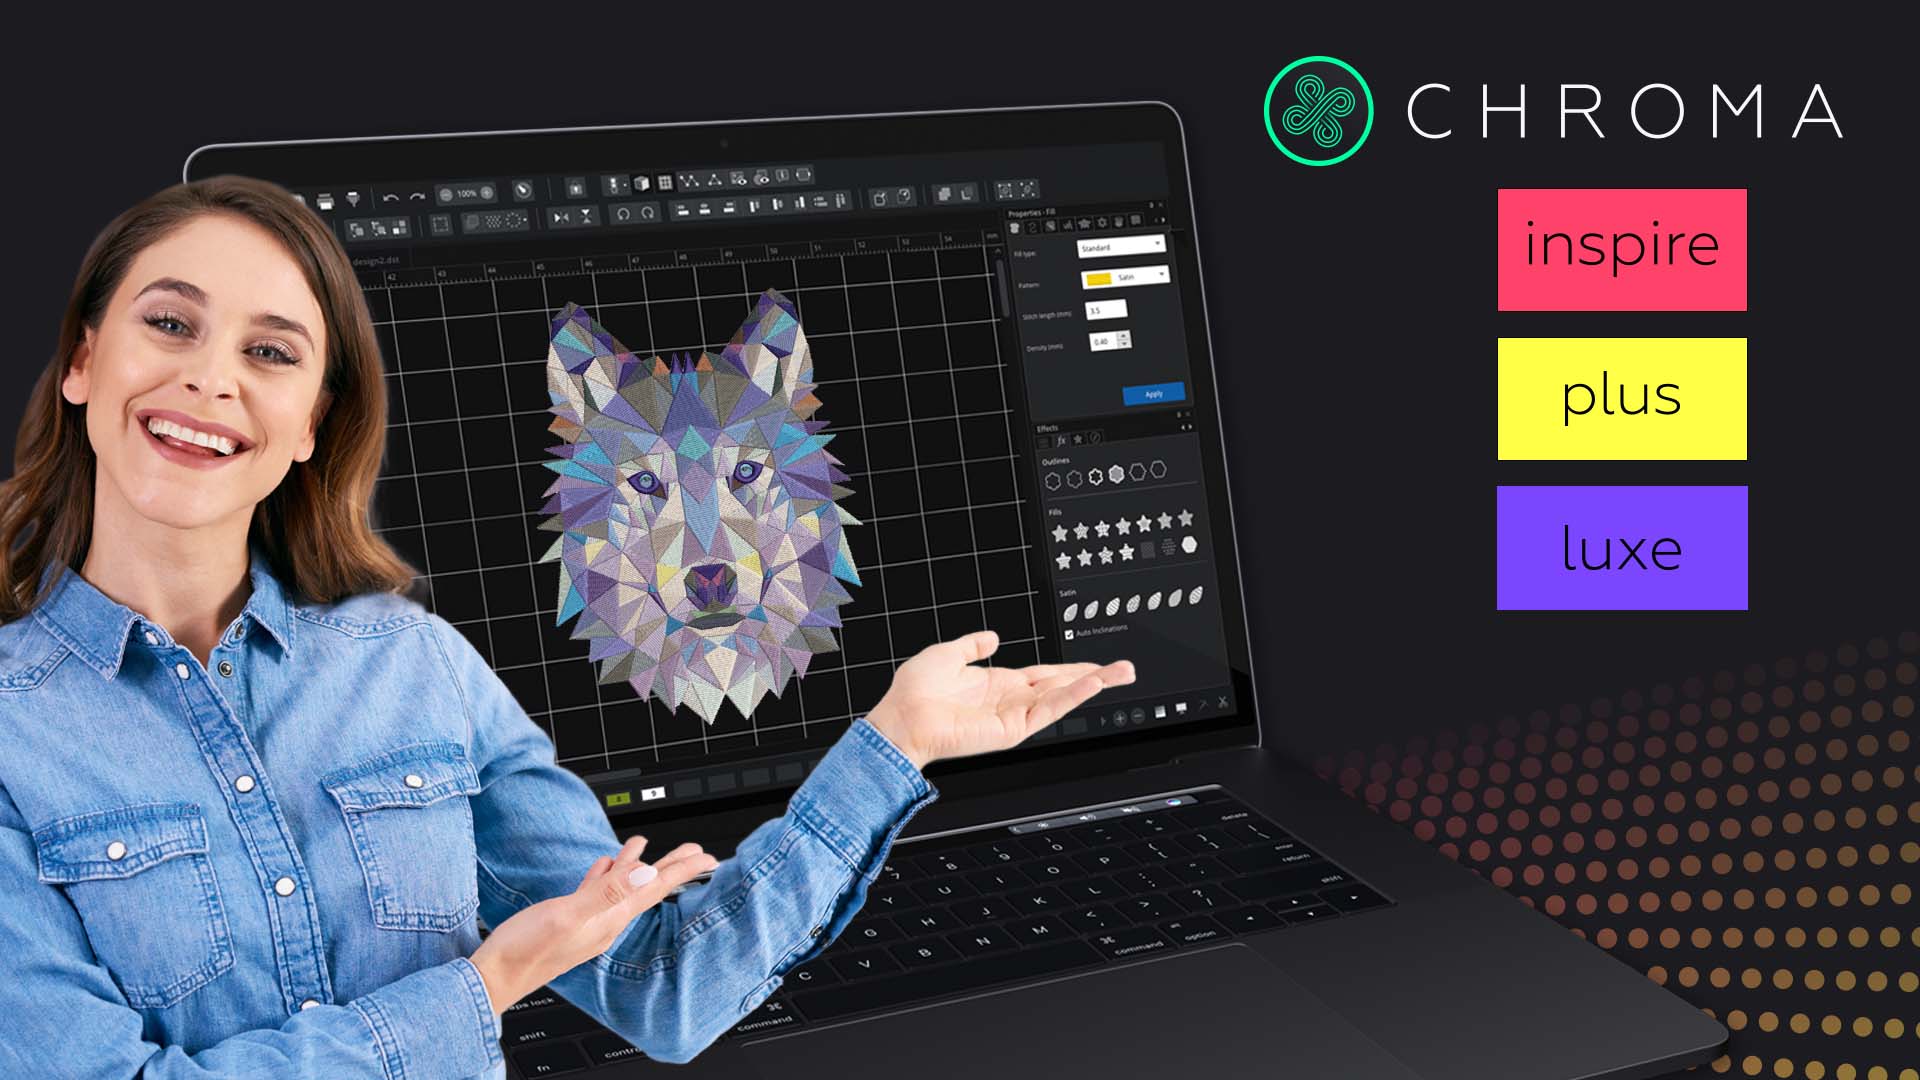
Fortunately, in addition to the various custom apparel equipment and accessories Ricoma provides, we also offer the industry’s leading digitizing software – Chroma.
This easy-to-use, state-of-the-art digitizing software is designed to allow novice and experienced digitizers alike to create any design with ease and speed.
To make digitizing even more accessible to our customers, we offer three unique tiers: Chroma Inspire, Chroma Plus and Chroma Luxe. Each tier comes with its own unique set of tools and features that will allow any digitizer to enjoy the custom digitizing experience that they are looking for.
In this blog, we will walk you through the many amazing features Chroma has to offer as well as some of the key similarities and differences between each tier.
We’ve also highlighted the main tools and features within Chroma’s interface for each tier to help you understand how each tool works such as file functions, view, editing, lettering and digitizing.
But before we dive into the different tiers – let’s take a look at what Chroma Digitizing Software has to offer.
Why Chroma?
Chroma’s revolutionary design features an intuitive interface, built-in styles, and a wealth of customization tools that allow digitizers of all skill levels to create intricate designs fast and easily.
Each tier of Chroma software can run on both Mac and PC operating systems – meaning that you can use Chroma on whatever computer you are currently using for your home or business. And unlike other digitizing software – there is no need for a clunky dongle to export your design from your computer to your machine.
Also, each tier comes with a preloaded library of fonts. However, you can upload new fonts at any time – giving you the freedom to embroider any text design that you can imagine.
Furthermore, while each tier of Chroma is compatible with any computer and embroidery machine, Chroma gives you the option to wirelessly export your design directly from your computer to any Ricoma embroidery machine utilizing the new WIFI compatible 8S touch screen – such as the SWD-1501 and the MT-2001.
Now that we’ve had a look at the benefits of using Chroma Digitizing Software, let’s compare what each of the different tiers has to offer – starting with Chroma Inspire.
Chroma Inspire
Chroma Inspire offers all the basic features of most digitizing programs, including the ability to import designs, edit shapes, change thread colors, auto-digitize and so much more.
It is the perfect software option for beginners, hobbyists and anyone interested in making simple edits to their digitized designs.
To make things as easy to understand as possible, we’ll go through each tab in the software and talk about all of the tools included in them, starting with the “file” tab.
File Functions
The file functions for Inspire, which are the tools found under the file tab in the software, include all the basics for digitizing.
You have the “save as” button, which allows you to save your digitized design in any embroidery format.
Ricoma machines use DST files, but you can also save it as a PES, PHC or any other file type that works with your machine. You can also import artwork in order to digitize it.
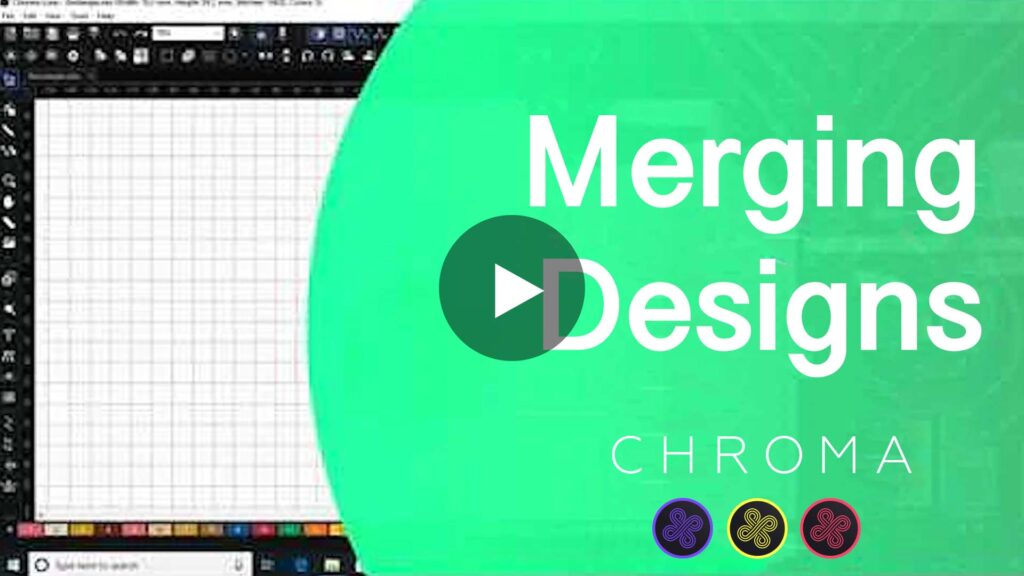
One of our favorite tools found in the file tab on Chroma Inspire is the merge feature.

This feature allows you to combine multiple designs within the same file to embroider them back-to-back instead of wasting time switching between files.
To see how this awesome feature works, you can check out our short merge tool tutorial on YouTube.
Lastly, Chroma Inspire has a simulate embroidery feature, which allows you to see the entire embroidery process from start to finish.
This helps you know if you need to tweak anything, such as stitch density, machine trims, overlaps and object positions before finalizing your designs and sending them to be embroidered.
View
Other tools to help you view your design before embroidering can be found in the “view” tab of your Chroma Inspire software.
You will have the option to view your design in the standard or realistic view, which will give you a more accurate idea of how your digital design will look once it’s embroidered.

You will also have a ruler tool to help make your designs more accurate, and a hoop function to let you know how your design will fit in the hoop you are using to embroider it in.
From start to finish, Chroma Inspire gives you complete control over the digitizing and design process. You’ll be able to manually digitize as well as edit the background and fill stitch color of any design.
Chroma Inspire also allows you to decide what order your design is embroidered in, as well as where your stitch should start and end so that you can make any necessary color or thread adjustments throughout the process to ensure your design turns out exactly how you want it to.
Finally, Chroma Inspire gives you the ability to center your design based on whatever hoop you are using for a given project – reducing the risk of needle breaks and giving you a wider array of freedom in terms of what kind of apparel you embroider.
Combined, these tools give you the most accurate view of how your designs will appear once they are embroidering – offering you the most comprehensive digitizing experience possible.
Editing
Chroma Inspire has all the basic editing tools you need to make the digitizing process easier to navigate.
With Inspire, you will be able to change stitch types, set angles, add or remove density and create custom artwork and logos.
And that’s just scratching the surface of the tools that are available to you!
To run you through the rest of the editing functions in this tier, we have a helpful YouTube video on the editing tools available in Chroma Inspire.
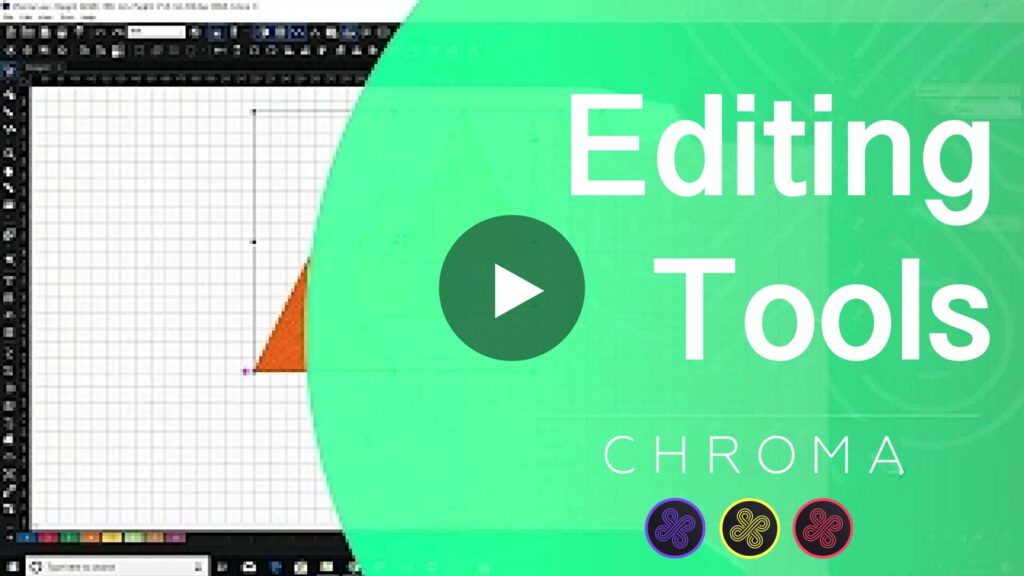
This video will show you all the editing tools available, where to find them and how they are used. You will learn things like how Chroma’s editing tools are used to center your text, flip images, create brand new shapes and more!
Some of our favorite tools in Chroma Inspire’s editing tab are the Carousel/Place/Reflect/Scatter features. These tools allow you to duplicate your design and arrange them however you see fit.
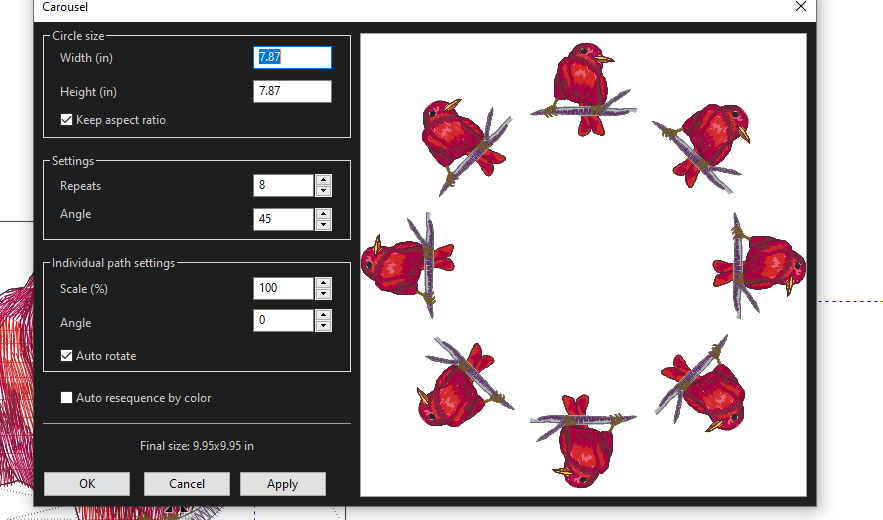
You can select objects or words and create a circle with them by using the Carousel function.
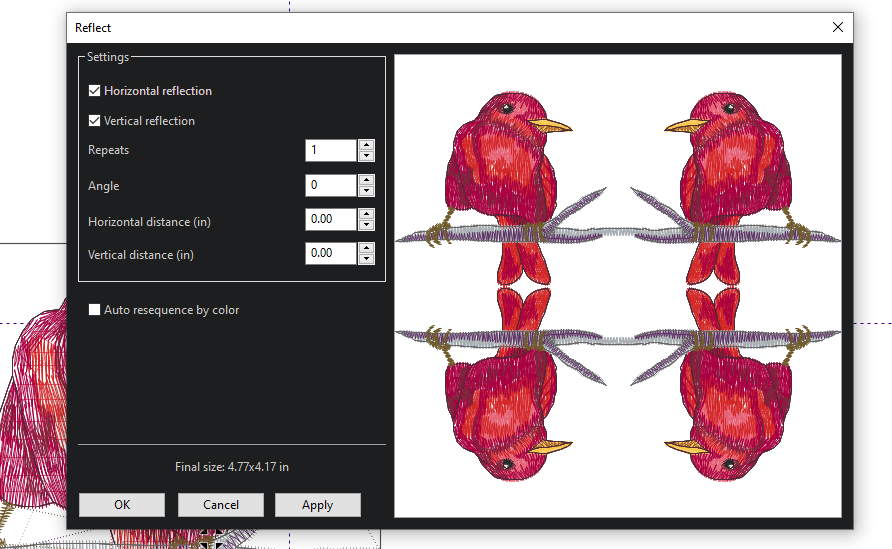
With the Reflect feature, you can duplicate a design horizontally or vertically.
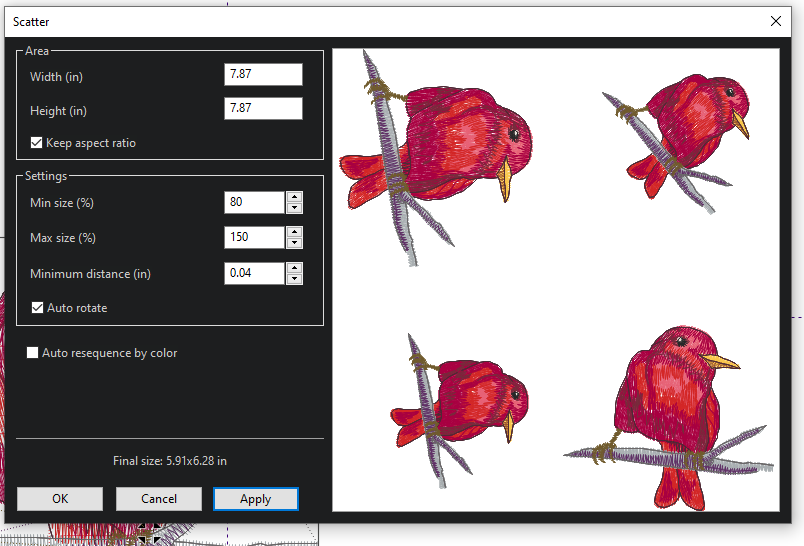
You can even scatter objects with the Scatter function to create confetti effects or interesting design elements.
Lettering
Now that we’ve covered the tools used to edit your embroidery lettering, let’s talk about the lettering itself.
Chroma Inspire comes with 43 pre-digitized fonts and 2 small fonts you can choose from to create any word or phrase you need for a given project.
Best of all, with Inspire, you can add text directly to your design and combine it with any existing image you are working on.
You can also use the true type font tool, which allows you to digitize fonts you have downloaded online, and monogram text types to add some flair to your embroidery.
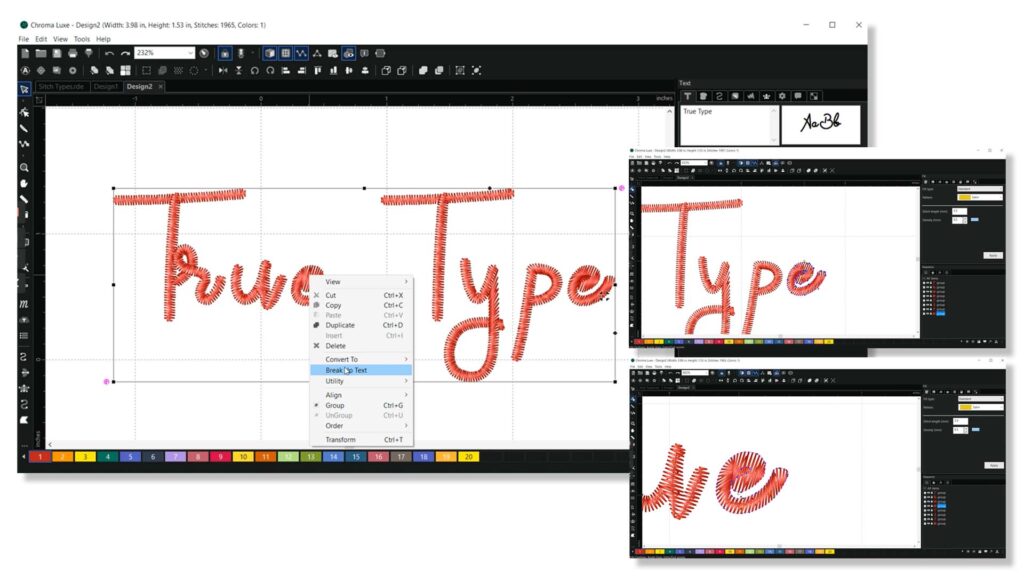
Inspire also gives you the ability to edit pre-existing text in a design if it is saved as an RDE file – so you’ll never have to start from scratch if you only need to make a few simple edits.
You will also be able to break up existing text if you need to embroider around an object.
With these tools, your lettering options are more flexible and you can do some pretty cool things like monogram a towel or embroider names to personalize items in a variety of professional fonts.
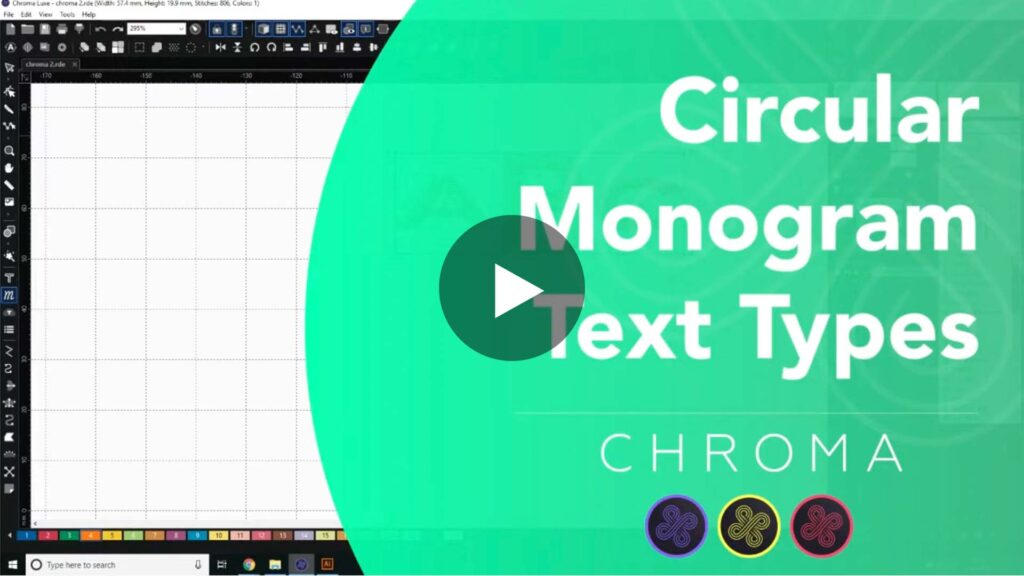
If you need a visual to help you understand how some of these lettering tools work, you can watch our video about true type fonts as well as a step-by-step explanation on how to use the monogram text tool on our Chroma YouTube channel.
Digitizing
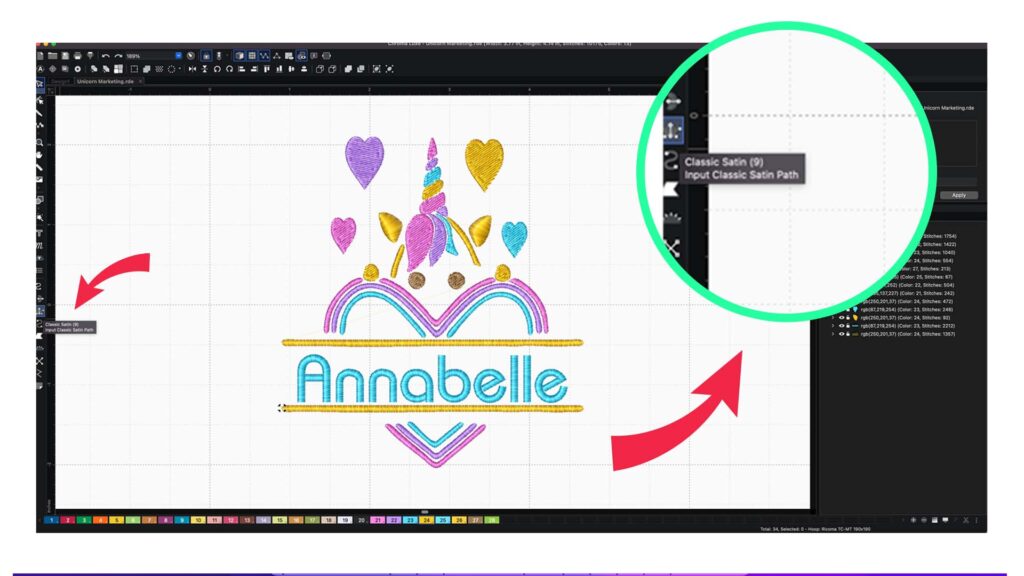
When you digitize a file, you have the option to digitize each section on your own and choose whether it will be a classic satin stitch, a complex fill or if there will be areas in your design that will have no stitching.
Some beginners may not know how to complete this entire process on their own, so Chroma Inspire also allows you to auto digitize.
With auto digitizing, you can turn a vector file or jpeg into an embroidery file with just one click.
If you are a beginner and still need more information about digitizing and what you should look out for, we recommend reading through our blog about the Do’s and Don’ts of auto digitizing.
Now that you know all the features that come with our Chroma Inspire software, you can compare it to our other tiers (Plus and Luxe) in the following sections to see which combination of features best suits your needs.
Chroma Plus
If you’re a hobbyist who needs some extra features to get the most out of an embroidery project, or if you run a small-scale embroidery business, upgrading to Chroma Plus might be the right move for you.
Chroma Plus includes all of the features found in Chroma Inspire and more, hence the “plus.”
Read on to discover the additional features available in the Plus tier.
Tools
With Chroma Plus, you gain batch conversion as an extra tool feature. This is a very handy function for converting multiple embroidery files into different formats at the same time.
For example, say you have old embroidery design files you wish to use with a new machine that reads a different format.
With batch conversion, you would be able to select multiple design files at once and convert them all into the proper format in just one click.
Editing
Speaking of making things easier, the editing tools you gain when you upgrade to Chroma Plus will make the digitizing process simpler while also giving you more options when you are digitizing your designs.
With Chroma Plus, you will gain the following editing tools:
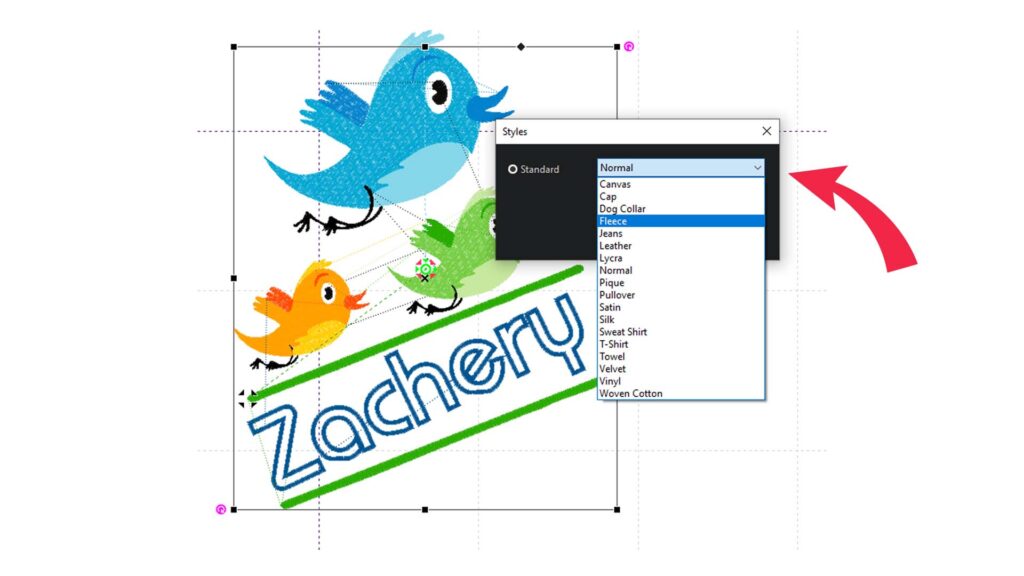
- Change style function – The change style function allows you to quickly change your digitizing style to match the fabric you are working with. For example, you can change the style from embroidering on cotton to embroidering on spandex and it will adjust the settings for your pull compensation, underlay and stitch density automatically to match the fabric you will be embroidering on.
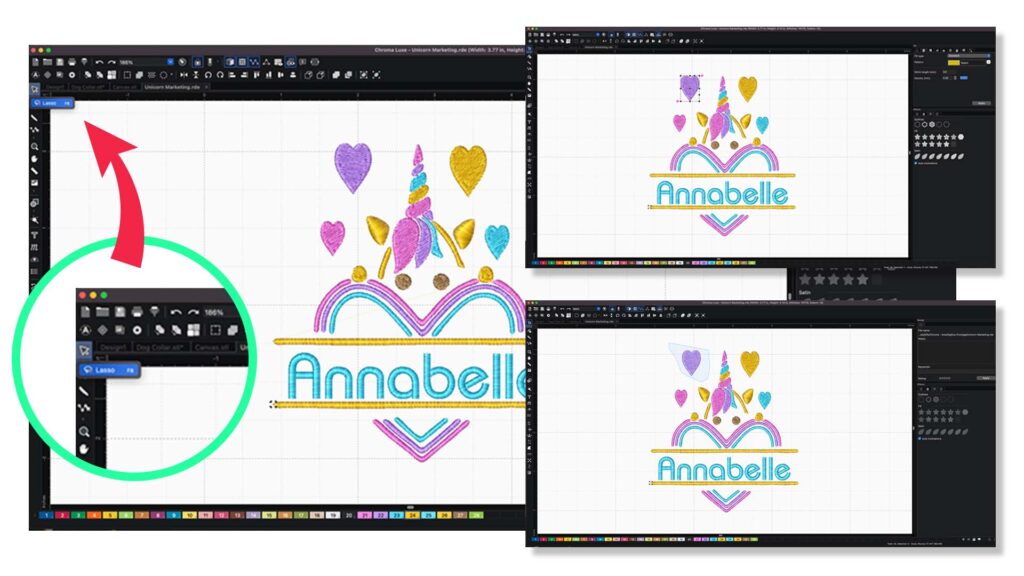
- Lasso tool – The lasso tool allows you to select odd shapes or stitch ends in your design in order to edit them. With the added flexibility of the lasso tool, you will be able to edit and clean up your designs at a much higher level.
- Stitch tool – The stitch tool allows you to control the stitch types in specific areas of your design. You will have more stitch types to choose from in Plus than in Inspire, so you will need a tool to manage and change them if necessary.
Lettering
When you upgrade from Inspire to Plus, you will almost double the pre-digitized font options you have access to.
With 72 fonts at your disposal, you will be able to give your customers more options to choose from and be more creative in your designs.

With Chroma Plus, you will also gain the ability to use the Order Option, which allows you to decide what order you want your letters to be embroidered in.
This is especially useful in cap embroidery, as caps should be embroidered from the center out instead of from left to right to avoid registration issues.
Another great lettering feature in Plus is the Shift Option tool, which allows you to shift the path of your lettering.
For example, if you have a curve in your design, you can shift the path of your lettering to match the curves of an image instead of following a straight path. You can even create spirals of text for eye-catching graphic effects in your designs.
On top of all the options above, you will also be able to convert text into 1 of 10 appliqué fonts by choosing or importing an appliqué design into Chroma. This way, you will be able to add text to your appliqué designs.
No matter what you choose to do with the added lettering options on Chroma Plus, you will always end up with a professional finish.
Digitizing
Finally, your added digitizing features will increase your arsenal of digitizing tools seven-fold.

That’s a lot of added features that will help make digitizing easier for you and make your embroidery designs more attractive to potential customers.
One of the features that will really up your embroidery game is the stitched snapshot feature, which allows you to create detailed embroidery designs from high-definition images.
Click here to see this tool in action!
In addition to stitched snapshots, you will be able to trim, weld, intersect and combine the designs you are trying to digitize.
This can make editing easier as you can use the combine feature to edit multiple designs at once, or use the break apart function to edit parts of the same design separately before combining them again when you send the design to embroider.
With Plus, you will also gain the Command feature, which lets you set trims, frame outs and pauses throughout your design without having to directly program them into the machine.
You can also convert your stitches to different stitch fills with the “convert to” function if the stitch you are using does not suit the look you want for your design or the fabric it will be embroidered on.
As you can see, the Plus version of our Chroma software offers you more control over your embroidery file, as well as more options to choose from.

All of these extra features are great for small business owners looking to improve the quality of their digitizing.
But Chroma still has more to offer!
Chroma Luxe
Chroma Luxe is our third and final digitizing tier, containing all the features in Inspire and Plus – and then some!
This tier is ideal for anyone with a large-scale embroidery business or even small business owners who receive a lot of specialized embroidery requests.

Chroma Luxe can provide you with all the digitizing features you will ever need —and more!
File Functions
For added file features, Chroma Luxe offers the Special Files, Design Analytics and Print Catalog features.
The Special Files feature allows you to edit your special effects and save them for future use.
This means you can adjust the shape or length of a stitch effect, like a wave or other distortion, and use it in other projects without having to recreate the effect each time.
The second feature, Design Analysis, gives you a comprehensive breakdown of your design.
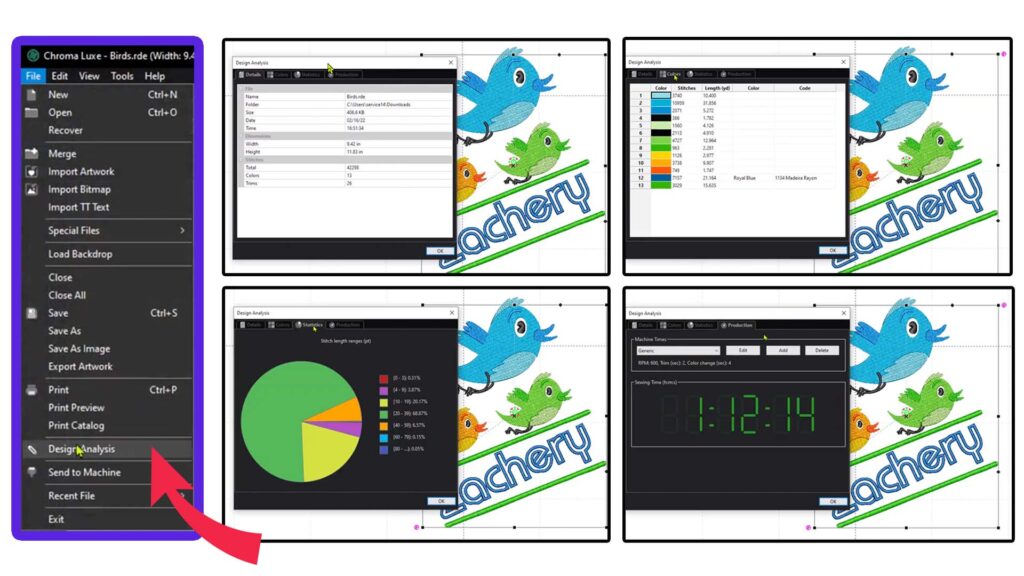
You will be able to view all the stitch types and lengths in your design, as well as the amount of time it will take to embroider.
The Design Analysis feature can help you to better plan out large embroidery runs for your business, which will make the process much more efficient.
Finally, the Print Catalog option allows you to print your full catalog of all the design files you have saved on your software using whatever file your embroidery machine requires.
This can be especially useful if you want to create a portfolio or catalog to show your potential customers.
View
When you upgrade to Chroma Luxe, you will receive a new view feature called the Filter function.
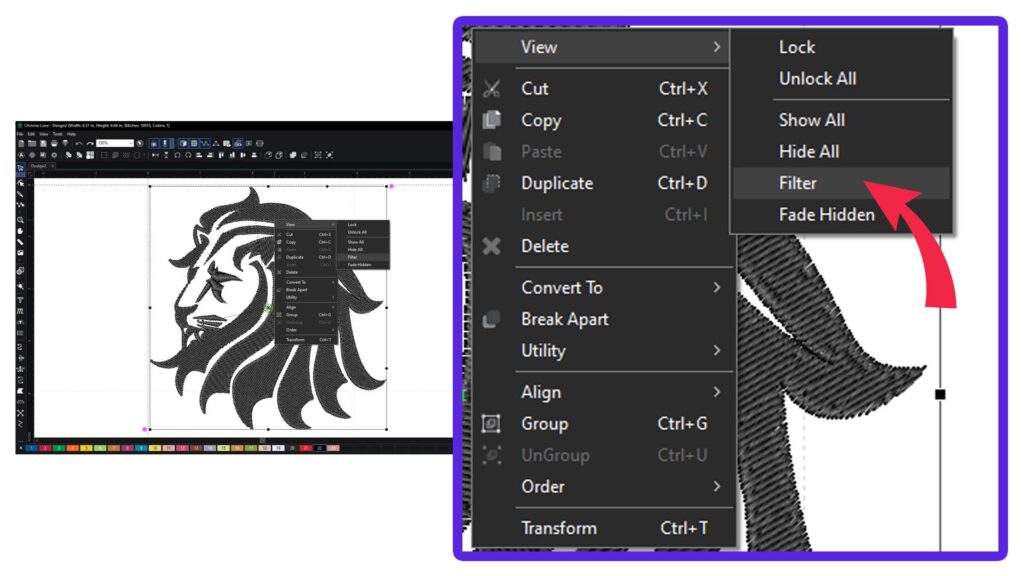
This function lets you filter out stitches in a specific range, so you can identify and eliminate stitches that are redundant or too short.
Filtering out unnecessary stitches also helps you avoid thread breaks, which will save you time and hassle.
Editing
For editing tools, you will gain the slice tool when you upgrade to Luxe.
With the slice tool, you can cut any part of your design and use it in a different way in your existing design or make it into a brand-new design.
This gives you the freedom to only use parts of a digitized design, or add to it using pieces of a past design.
Lettering
If you think the 72 pre-digitized fonts on Chroma Plus is a lot, try having 133 pre-digitized fonts right at your fingertips.
And on top of all that, you will be able to download multiple fonts and save them to your machine’s memory for even more font options!
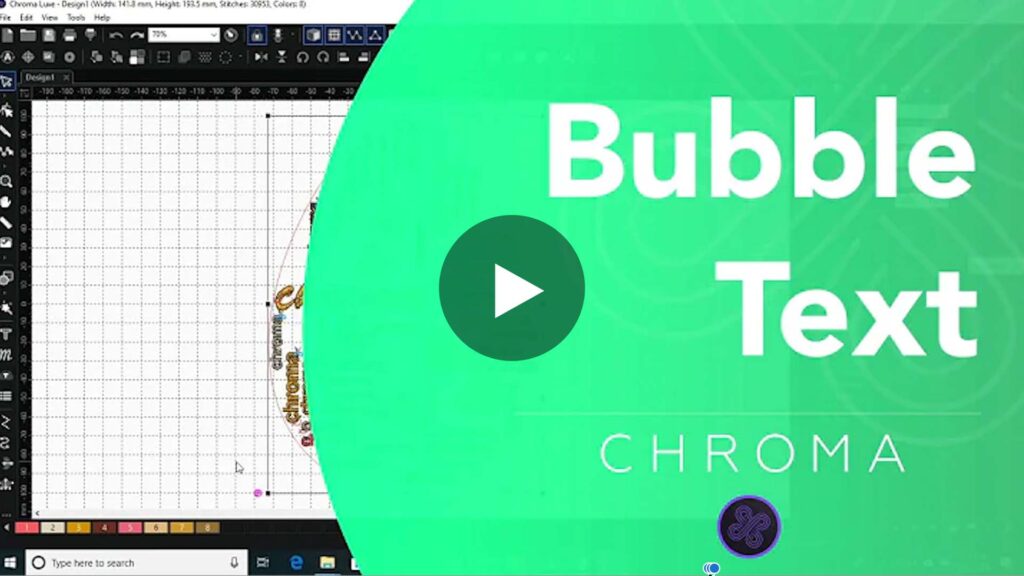
You will also have access to puffy fonts to create unique designs, as well as bubble text. If you don’t know what bubble text is, it is when you use words to fill in a shape.
By taking advantage of all these extra lettering options, you can create even more digitized designs that will impress anyone who lays eyes on them.

Digitizing
When it comes to digitizing features, there is no shortage of tools on Chroma Luxe!

There are 15 added features on Luxe if you upgrade from Chroma Plus.
That means 15 extra tools you can use to create interesting new designs and improve the efficiency of your digitizing.
Among the most popular features that Chroma Luxe offers is the Nap Blocker tool. This allows you to create a knockdown stitch that reduces the nap on textured fabrics and allows you to stitch over a smooth surface, preventing your stitches from sinking into textured fabric, like terry cloth.
A few of the other handy tools that Chroma Luxe offers include:
- Pattern Creator – Allows you to create your own patterns that you can save and reuse as you’d like, saving you a lot of time in fulfilling similar orders or bulk orders.
- Palette Creator – Create and save custom color palettes that you can easily reference in the future.
- Utility Tool – Allows you to quickly create borders and outlines around text or objects with the click of a button, which you would otherwise need to do manually.
- Gradient and Color Blending – Create color gradients in your embroidery to give your garments a unique look that your customers will love.
- Jagged Type – Create jagged text to give your designs an edgy look.
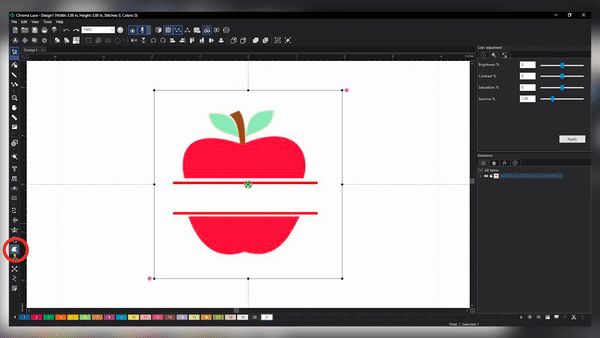
- Split Design – This is one of the most useful tools Chroma Luxe has to offer as it allows you to perfectly split oversized designs that are too large to embroider in one hoop, giving you the ability to embroider larger projects with a high level of precision.
You can see the “split design tool” at work in this episode of Apparel Academy.
- Appliqué – Create appliqué designs from scratch, including adding texts and shapes of your choosing. An appliqué cutter is also an added tool you can use in Luxe to create multi-media designs.
In addition to the tools listed above, you will also have access to a note function where you will be able to save notes about certain designs.
This can help larger businesses with multiple machine operators to access important information about specific projects, machine settings, etc.

Lastly, we would like to mention the magic wand tool.
This tool really makes you feel like a digitizing wizard as it allows you to choose elements in your design and magically convert them into a stitch type of your choosing.
This tool is typically used in tandem with the backdrop tool to section off your design into editable elements that the magic wand can then turn into stitches.

The Bottom Line
These three tiers provide a wide range of digitizing options that can accommodate beginners, hobbyists, business owners and even digitizing experts.
Each of Chroma’s tiers allows digitizers of all skill levels to create intricate designs fast and easily.
Chroma Inspire offers you easy-to-use tools and features to help you get started on your digitizing journey.
Chroma Plus moves you beyond the basics and into a more intermediate level of digitizing with additional fonts, tools and functions.
Chroma Luxe includes everything from Inspire and Plus but also unlocks advanced yet easy-to-use features that will enhance your digitizing experience like no other software on the market.
Now that you know what each Chroma tier has to offer, which Chroma software are you most interested in: Inspire, Plus or Luxe?