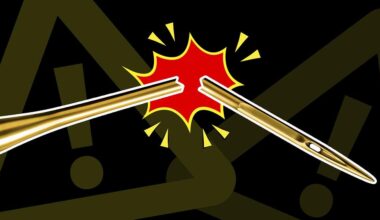
Beeeep!
There goes that thread break alert again.
Frustrating, isn’t it?
But it doesn’t have to be.
If you’re struggling with thread breaks and aren’t sure how to avoid them, read on to discover…
- The four different types of thread breaks
- How to diagnose a thread break
- And how to avoid your next thread break
Diagnosing a thread break
First off, it’s important to understand why thread breaks happen in order to diagnose your thread break. The four main types of thread breaks are:
Shredding: The thread shreds near the needle
Clean breaks: The thread breaks cleanly
Pop outs: The thread pops out of the eye of the needle
False thread breaks: The top thread remains attached to the fabric
Common reasons for thread breaks in machine embroidery

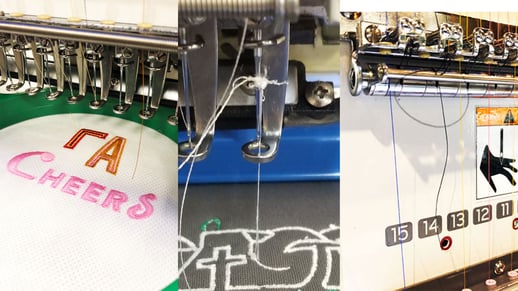
Reason #1: Improper top threading
If your thread path is threaded incorrectly, the thread can be skipping a point in the path that adds tension. Improper threading can also cause snagging, which prevents the thread from flowing smoothly through the thread path, causing thread breaks.
Reason #2: The bobbin
A bobbin is a small (usually white) spool of thread held in the machine’s sewing arm.
Bobbin thread is often referred to as “bottom thread” because it’s located underneath the needle plate inside the sewing arm. On the other hand, the spools of thread on top of your machine are referred to as top thread.
Since machine embroidery requires these two threads, both threads must feed through their path seamlessly to “catch” each other and perform a stitch.
This is why it’s imperative to make sure the bobbin is feeding through the right mechanisms in order to fulfill its purpose.
When holding and pulling the bobbin in your hand, the thread must turn clockwise before placing it into the front loading bobbin case.
Pro tip: We recommend using pre-wound magnetic bobbins because it feeds off the spool consistently. If you’re using self-wound bobbins, be sure to ensure the bobbin is wound correctly and that the tension of the bobbin thread is even.
Reason #3: The needle
Threads can break if your needle is not inserted properly. Make sure the eye of the needle is facing the front (not slanted) and that the scarf (indent) of the needle is facing the back. Burrs in the needle may also cause the thread to shred.
It’s also important to check up on your needles from time to time. Over time, needles will become dull and can bend when you embroider over thick items. This can cause your thread to break because the needle can get snagged and will pull the thread too tightly.
Pro tip: Titanium-coated needles are the most durable and are possibly the best investment possible for your machine. Click here to learn more about the different types of needles and which needle you should use for your next embroidery project.
Reason #4: The thread
Damaged or old thread can cause your thread to break as well. Make sure you’re storing your thread away from sunlight or heat to avoid damage.
Pro tip: If you see a lot of extra thread winding off your spool before it’s lifted up into the thread lift guide, you may need to get rid of the thread because it might be old or damaged. Click here to learn how to test your thread for damage.
Reason #5: Tension
Your top thread passes through tension discs along its thread path. These tension discs can be set to high or low tensions depending on the type of fabric you are embroidering and the thickness of the thread you are using.
If your top tension is too tight, your thread will also break because too much tension is being exerted on that thread.
Think of it this way: The more tension that is exerted on the thread, the more the thread is stretched, increasing the chances of getting a thread break.
Therefore, make sure your tensions are correct with an “I” test, which is a one-inch satin stitch column that you stitch out on each of your machine’s needles to test their tensions.
Once complete, examine the back of the design. Ideal tension settings will display one third bobbin thread down the center and one third top thread down both sides of the column. Click here to download a bonus video on how to test your tensions.
Reason #6: Burrs
Burrs on the needle plate, rotary hook assembly or in the thread path can also cause threads to shred.
If that’s the case, you may need to polish the burrs or replace the parts. Click here to learn how to smooth out burrs on your needle plate.
Avoiding your next thread break
To avoid your next thread break, you first need to double check that you are covering your bases. Here’s a mini checklist to follow:
- Is the thread path threaded correctly?
- Is the fabric hooped tight enough?
- Are my tensions correct?
- Is the needle inserted properly?
- Are my threads healthy?
- Do I have any burrs in the needle or needle plate area?
To learn more about why thread breaks can happen and how to troubleshoot your next thread break, click here to to download a free thread break troubleshooting guide.
Bottom line
Thread breaks can be frustrating, but if you understand the type of thread break you’re having and why they’re happening, you’ll be able to avoid future hassles.
Happy embroidering!
The Ultimate Thread Break Troubleshooting Guide
Within this guide, you’ll receive an easy-to-use thread break troubleshooting map to get you back up and running in no time! You’ll get…
✓ Step-by-step instructions for how to fix any thread break issue
✓ Tips for avoiding future thread breaks
✓ 4 different types of thread breaks you need to know before troubleshooting
✓ Tips on hooping your garment to ensure the best possible outcome
+ BONUS VIDEO on how to adjust thread tension for better quality embroidery!