It’s past midnight and you’re still awake as your embroidery machine hums away. At this point, you must face the following inevitable truth:
It’ll probably take all night to finish that large order.
If this sounds familiar, it’s because most machine embroiderers face this problem. However, you can take steps to keep your production flowing and ensure it doesn’t happen to you.
Whether you’re just getting started or already run an established apparel business, use these time-saving tips during your next run!
#1: Consider spool placement
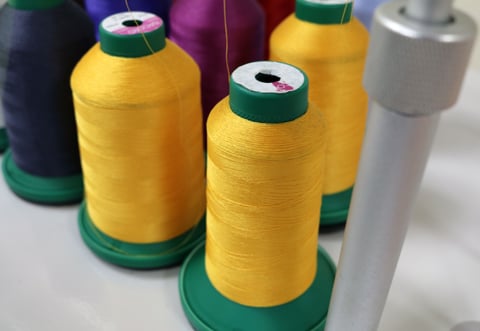
This is more important than you think. If you frequently embroider a certain color, have more than one spool of that color already threaded on your machine. That way, you easily can switch to a different needle number and you won’t waste time rethreading a new spool.
You also should keep the color spools you’re using next to each other to save time between color changes. The machine will take less time to move between the first and second needles than between the first and ninth needles. Ensure the color spools are placed in order of the color sequence so that the machine only has to move to the next needle. Saving just a few minutes in this manner can add up to hours saved on a large order.
Also, when testing, embroider your design with the correct colors. Most machines will save your settings so you can just press “Start” when beginning production.
Watch this video to learn some of Ricoma CEO Henry Ma’s top 5 efficiency tips!
#2: Have backup supplies ready
In the embroidery business, the ultimate goal is to eliminate machine downtime at all costs. Waiting for one item to finish embroidering before you start hooping another item will cost you more money than you realize, so having backup supplies is a must. Invest in an extra set of hoops to quickly start embroidering an item after another one has been finished.
You also should keep extra bobbin cases threaded so they quickly can be switched when your bobbin runs out.
#3: Multitask when possible
To keep a steady flow, perform all post-embroidery cleanup — such as trimming threads and removing stabilizer — while embroidering the next garment or set of garments. Time all of your tasks — even the small ones. This will help you become more aware of how long orders take. That way, you can accurately measure production time and set goals to reduce how long each task takes.
#4: Stay organized

When you know where everything is, you won’t waste time looking for materials. Set up an organized workstation with all materials for prep and post-embroidery cleanup at your disposal. Hanging all your hoops in order from smallest to largest can be a big time saver. When selecting colors on your machine, label your thread spools with the corresponding needle number to avoid wasting time counting them.
Watch the video below to learn the importance of staying organized!
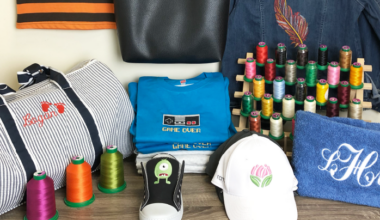
#5: Have the right tools
This will facilitate the production process in any shop. Consider the type of order you’ll be embroidering. For example, if it’s a large order of left-chest logos, you can save time by purchasing precut sheets of stabilizer instead of cutting them from a roll. You also should consider purchasing specialty hoops, such as magnetic ones that cut hooping time and reduce hoop burns. Click here to learn more about magnetic hoops.
If there is more than one person on your team, make sure each production staff member has a set of supplies. Over time, the cost of additional materials is significantly lower than that of all the time spent waiting for someone else to finish a task — or searching for misplaced materials.
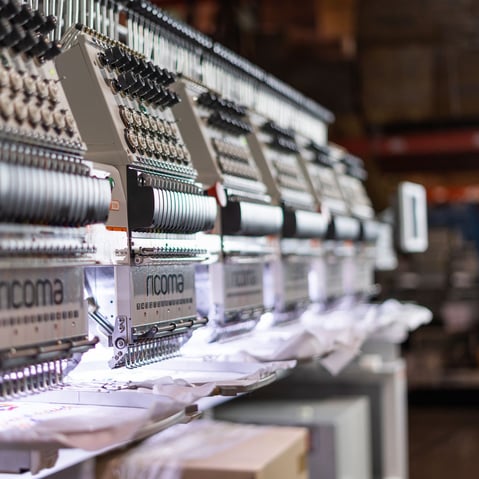
#6: Get to know your machine
.jpg?width=480&name=52051044_2156656517758314_1935945732599054336_o%20(1).jpg)
Make time for the extra tasks that, while not necessarily part of the embroidery process, will keep you from running into issues during it. For example, learn something new about the craft every day. Discovering how certain adjustments affect different materials will save you time and money during production. For example, if you experience continuous thread breaks because you’re unaware of how tension settings affect embroidery, you’ll wind up frustrated and spending more time than needed on the process.
You should also record the best practices that have worked for you each time you embroider an item. Include information such as the fabric, thread, needle, backing and tension setting used. Keeping a list handy will save you time in subsequent testing and research. Luckily, we compiled a list of fabrics with the best practices to use on each for you.
#7: Expand
You can get a lot more work done in a fraction of the time with multihead embroidery machines. They may cost more in terms of upfront investment, but you’ll dramatically cut labor costs to offset the financial stress of a larger machine purchase.
If you’re thinking of expanding, keep a singlehead machine for sampling, testing and one-off orders. Meanwhile, keep your multihead running during production on larger orders. If you have multiple machines and embroider caps, leave the cap driver installed on one machine and the flat brackets installed on another. If you run more flats than caps, leave the flat brackets on the larger machine and vice versa.
*This article was originally published on Impressions Magazine.
Are you curious how Ricoma can help your custom apparel business?
Schedule a call for a Quick 30 minutes “Embroidery Talk” with our specialists to see if you’re really ready to start or expand your business. Our specialists can help you…
- Find helpful resources to kick start your embroidery education
- Answer any questions regarding pricing your items for profit and sourcing materials
- Help you compare and contrast different machine types and branch in the industry
- Help you determine which machine would suit your business based on your current and future goals