Wondering how to remove vinyl from a shirt? Don’t sweat it! With a few tricks up your sleeve, you’ll be a pro in no time. Removing vinyl from a shirt might seem daunting at first, but with the right knowledge and techniques, it’s totally doable.
We’ve all made shirt customization mistakes — staring at a shirt with outdated vinyl, wondering if we should just toss it or give it a new lease on life. The good news? You can absolutely breathe new life into that old favorite!
Let’s explore various methods, from heat application to freezing techniques, ensuring you have all the tools you need to tackle this project successfully.
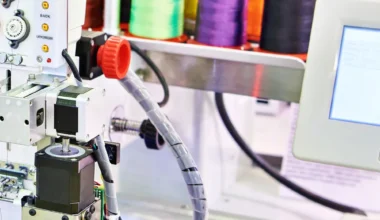
Looking for some new vinyl cutters for your projects? Look no further — Ricoma has you covered for all your vinyl crafting needs!
Preparation Before Removal
Before we jump into how to remove vinyl from a shirt, let’s talk preparation.
Proper preparation is like laying the foundation for a house – get it right, and everything else falls into place. Skip it, and you might end up with a damaged shirt and a lot of frustration.
So, what does good preparation entail? It’s all about understanding what you’re dealing with and gathering the right tools for the job.
Assessing the Vinyl Type and Age
First things first, let’s play detective with your vinyl. Is it a heat transfer vinyl or an adhesive type? The age of the vinyl also plays a crucial role in determining the best removal method. Newer vinyl might come off more easily, while older, more stubborn vinyl might require a bit more elbow grease.
To identify the type of vinyl, look at its texture and appearance.
When it comes to heat transfer vinyl removal, remember that this type often has a smooth, plastic-like feel and can be slightly raised from the fabric.
Adhesive vinyl, on the other hand, tends to have a more matte finish and lies flatter against the shirt.
As for age, well, you might need to jog your memory a bit! If you can’t remember when you got the shirt, look for signs of wear and tear on the vinyl itself. Cracking, peeling edges, or faded colors are all indicators that you’re dealing with older vinyl.
Once you’ve cracked the code on your vinyl type and age, you can make an informed decision on the best removal method. For instance, newer heat transfer vinyl might respond well to the heat method, while older, more stubborn vinyl might require a chemical approach.
Gathering Necessary Tools and Materials
Now that we’ve got our vinyl figured out, it’s time to assemble our vinyl-removing toolkit. Think of this as preparing for battle – you want to be fully equipped before you face off with that stubborn vinyl!
Essential tools for vinyl removal include:
- An iron or heat press
- Vinyl remover solution
- Plastic scrapers
- Tweezers
- Ice packs or access to a freezer (depending on the method you choose)
- Protective gear — gloves, face mask (especially if you’re using chemical removers)
Pro tip: set up a clean, well-lit workspace before you start. Trust me, good lighting can make all the difference when you’re trying to remove those last bits of vinyl. A clean surface also helps you keep track of your tools and prevents any unwanted stains on your shirt.
How to Remove Vinyl From Shirt: Methods
1. Heat Method
For DIY shirt vinyl removal, the heat method is often the go-to technique, especially for heat transfer vinyl. The principle is simple: heat softens the adhesive holding the vinyl to the fabric, making it easier to peel off.
For this method, you’ll need either an iron or a heat press. When removing iron-on transfers, make sure your iron is set to the highest heat setting that’s safe for your fabric. A heat press, if you have access to one, can provide more consistent heat across the entire vinyl design.
Safety first! Always use a protective cloth between the iron and the vinyl to prevent direct contact and potential damage to your shirt. Start by applying heat for about 15-20 seconds, then try to peel up a corner of the vinyl. If it doesn’t budge, apply heat for a little longer.
Note: It might take a few attempts to get the vinyl to start peeling, but resist the urge to rush. Slow and steady wins the race when it comes to vinyl removal!
Chemical Method
These solutions are designed to break down the adhesive holding the vinyl to your shirt.
Some chemicals can be harsh on certain materials, so always read the label carefully. And please wear gloves and work in a well-ventilated area when using these products!
To use a chemical remover, apply it to the vinyl according to the product instructions. You’ll usually need to let it sit for a few minutes to work its magic. Then, using a plastic scraper, gently start to lift the edges of the vinyl. The chemical should have loosened the adhesive, making the vinyl easier to remove.
After you’ve removed the vinyl, be sure to wash your shirt thoroughly to remove any chemical residue.
Freezing Method
The freezing method is a gentler approach that can be particularly effective on certain types of vinyl and delicate fabrics. The cold makes the vinyl brittle and easier to remove.
For vinyl decal removal from fabric using the freezing method, you’ll need either ice packs or access to a freezer. If you’re using ice packs, place them directly on the vinyl for about an hour. If you’re using a freezer, fold the shirt so the vinyl is exposed and pop it in for a couple of hours.
Once the vinyl is thoroughly chilled, take it out and immediately start to peel it off. The cold should have made the vinyl stiff and brittle, allowing it to break away from the fabric more easily. It’s like peeling a sticker off a cold surface – much easier than when it’s warm and pliable!
Note: This method is great for delicate fabrics as it doesn’t involve any harsh chemicals or high heat. However, it might not be as effective on older or more stubborn vinyl.
Mechanical Removal
This is the most hands-on approach and can be used in combination with other methods or as a last resort.
For this method, you’ll need tools like plastic scrapers, tweezers, and maybe even a lint roller for stubborn bits. Start by trying to lift a corner of the vinyl with your fingernail or a plastic scraper.
Once you’ve got an edge up, slowly and carefully peel the vinyl away from the fabric.
If you encounter resistance, don’t force it! You might need to reapply heat or chemicals to loosen the adhesive further. Use tweezers to grab small pieces of vinyl and a lint roller to pick up any tiny fragments left behind.
When correcting vinyl application errors, it’s tempting to get aggressive with stubborn vinyl, but your shirt fabric won’t thank you for it. Take your time, be patient, and your shirt will come out looking great!
Looking for everything vinyl? Explore our full collection of vinyl products, from cutters to HTV and more!
Step-by-Step Guide to Vinyl Removal

Before we start, a word of caution: always test your chosen method on a small, inconspicuous area of the shirt first. It’s like dipping your toe in the water before jumping in – you want to make sure the temperature (or in this case, the method) is right before committing fully.
Safety should always be your top priority. Wear protective gear when necessary, work in a well-ventilated area, and follow all product instructions carefully.
Using an Iron or Heat Press
Let’s start with the heat method. Here’s your step-by-step guide:
- Set your iron to the highest heat setting safe for your fabric. If using a heat press, set it to about 300°F (150°C).
- Place a thin cloth (like a pillowcase) over the vinyl design.
- Apply heat for 15-20 seconds, pressing firmly.
- Carefully lift a corner of the cloth and try to peel up the vinyl. If it doesn’t budge, reapply heat for another 10-15 seconds.
- Once the vinyl starts to peel, slowly pull it away from the fabric. If you encounter resistance, apply more heat.
- Use tweezers to remove any small pieces left behind.
- Finally, wash your shirt to remove any residue.
Different fabrics may require different heat settings. Cotton can usually handle high heat, while synthetic fabrics might need a lower temperature.
Applying Vinyl Remover Solutions
If you’re going the chemical route, here’s what you need to do:
- Work in a well-ventilated area and put on your protective gear.
- Apply the vinyl remover solution according to the product instructions. Usually, you’ll need to saturate the vinyl completely.
- Let the solution sit for the recommended time. This could be anywhere from a few minutes to half an hour.
- Using a plastic scraper, gently start to lift the edges of the vinyl.
- Slowly peel away the vinyl. If it resists, apply more solution and wait a bit longer.
- Once all the vinyl is removed, use tweezers to pick up any small pieces left behind.
- Wash your shirt thoroughly to remove all chemical residue.
Different vinyl removers may have slightly different instructions, so always read the label carefully.
Employing the Freezing Technique
Here’s how to use the freezing method:
- If using ice packs, place them directly on the vinyl and leave for about an hour. If using a freezer, fold the shirt so the vinyl is exposed and freeze for 2-3 hours.
- Remove the shirt from the freezer or take off the ice packs.
- Immediately start to peel the vinyl from one corner. The cold should have made it brittle and easier to remove.
- If the vinyl doesn’t come off easily, try bending the fabric. This can cause the brittle vinyl to crack and come away from the shirt.
- Use tweezers to remove any small pieces left behind.
- Wash your shirt as normal.
This method is particularly great for delicate fabrics as it’s very gentle.
Manual Peeling and Scraping
Finally, let’s talk about the hands-on approach:
- Start by trying to lift a corner of the vinyl with your fingernail or a plastic scraper.
- Once you’ve got an edge up, slowly and carefully peel the vinyl away from the fabric.
- If you encounter resistance, stop and try applying heat or a vinyl remover solution to that area.
- Use tweezers to grab and remove small pieces of vinyl.
- For very small fragments, a lint roller can be surprisingly effective!
- Once all visible vinyl is removed, wash your shirt to get rid of any residue.
Restore & Recreate Your Shirts with Ricoma!: How to Remove Vinyl From a Shirt
Removing vinyl from shirts can be a bit of a process, but with these methods in your toolkit, you’re well-equipped to tackle any vinyl removal project.
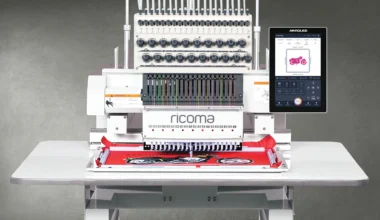
Now that you know how to remove vinyl from a shirt, you might want to venture beyond just removing vinyl. What if you want to breathe new life into your shirts with fresh, exciting designs? Browse through our sewing and embroidery machines so we can create something amazing together!