Creating your own bandana is a fun and rewarding DIY project that allows you to express your creativity while crafting a versatile accessory. Learning how to wear a bandana (and make one!) opens up a world of possibilities, from making fashion statements to using them as practical head coverings or even impromptu face masks.
This step-by-step tutorial will guide both seasoned crafters and beginners through the process of making custom bandanas that you’ll be proud to wear or gift.
Choosing Your Materials

The foundation of any great bandana lies in the materials you choose. Selecting the right fabric, thread, and tools is crucial for creating a high-quality, long-lasting bandana that looks and feels professional. The materials you choose will impact not only the appearance of your bandana but also its durability and functionality.
Fabric Selection
When it comes to choosing the perfect fabric for your bandana, you have several options, each with its own unique characteristics.
Cotton is a popular choice due to its breathability, softness, and ease of care. It’s ideal for everyday wear and can withstand frequent washing.
Silk offers a luxurious feel and drape, making it perfect for dressier occasions or as a fashion accessory.
Polyester is known for its durability and resistance to wrinkles, making it a practical choice for outdoor activities.
When creating a hair bandana, consider the weight and texture of the fabric to ensure comfort and style. Lightweight fabrics are more comfortable for warm weather and easier to tie, while heavier fabrics provide more structure and warmth. Smooth textures are versatile and easy to work with, but textured fabrics can add visual interest to your bandana.
Thread Options
The thread you use should complement your fabric choice in both strength and appearance. For cotton bandanas, a cotton thread is a natural choice as it will blend seamlessly with the fabric. Polyester thread is a versatile option that works well with most fabric types and offers excellent durability.
Consider the weight of your fabric when selecting thread strength. Lightweight fabrics require finer threads, while heavier fabrics can handle stronger threads. To ensure a professional finish, match the thread color to your fabric as closely as possible. For patterned fabrics, choose a thread color that blends with the dominant hue or opt for a contrasting color to create a decorative effect.
Tools You’ll Need
Having the right tools on hand will make your bandana-making process smoother and more enjoyable. Essential tools include:
- Sharp fabric scissors for precise cutting
- Measuring tape for accurate dimensions
- Straight pins to hold fabric in place while sewing.
- A seam ripper for correcting any mistakes
To enhance your bandana-making experience, consider investing in optional tools like a rotary cutter and self-healing cutting mat. These tools make cutting straight lines easier and more accurate, especially when working with slippery fabrics. A fabric marking pen or chalk is useful for transferring pattern markings onto your fabric.
Keep your scissors sharp and replace worn-out tools to ensure the best results. With the right materials and tools at your disposal, you’re ready to start creating your custom bandana.
Preparing Your Workspace
A well-organized workspace is crucial for efficient and enjoyable bandana-making (and for running your crafting business!). Before you begin, take some time to set up a comfortable and functional area. Ensure you have a clean, flat surface large enough to accommodate your fabric and cutting tools.
Good lighting is essential for accurate cutting and sewing, so position yourself near a window or use a bright desk lamp. Proper ventilation is also important, especially if you’re using fabric treatments or ironing.
Setting Up Your Sewing Machine
If you’re using a sewing machine for your bandana project, proper setup is key to achieving professional results. Start by selecting the right needle for your fabric type.
When sewing a head bandana, a universal needle size 70/10 or 80/12 works well for lightweight cottons.
Adjust your machine’s tension to suit your fabric. Test your stitch settings on a scrap piece of the same fabric you’ll be using for your bandana. This allows you to fine-tune the tension and stitch length before working on your actual project. Aim for even, balanced stitches that don’t pucker or loosen the fabric.
Creating a Cutting Station
A dedicated cutting station will make the fabric preparation process smoother and more accurate. Set up a stable, flat surface at a comfortable height for cutting. A kitchen table or craft desk works well, but ensure it’s covered to protect the surface from cuts.
Consider investing in a self-healing cutting mat. These mats protect your work surface and help extend the life of your rotary cutter blades. They also often have helpful grid lines for precise measurements and straight cuts.
Designing Your Bandana

Designing your bandana is where your creativity truly shines! A bandana for everyday wear might have a different design than one created for a special event or as part of a costume.
You can create themed bandanas for holidays, sports teams, or to match specific outfits. The possibilities are endless, from classic paisley patterns to modern geometric designs or even custom illustrations.
Selecting a Pattern or Design
There are numerous resources available for finding bandana patterns and designs. Etsy offers downloadable patterns, while craft websites often have free templates.
You can also draw inspiration from traditional bandana motifs, such as the classic paisley, which has roots in Persian art and became popular in Western bandanas in the 19th century.
If you’re feeling creative, consider designing your own pattern. You can use digital design tools to help you create complex patterns or repeating motifs.
Sizing Considerations
Standard bandanas typically measure around 22 inches square, but don’t feel limited by this convention! Consider the bandana’s purpose when deciding on size. For a head covering, you might prefer a slightly larger size, while a neck bandana could be smaller. Pet bandanas are usually triangular and sized according to the animal’s neck circumference.
To calculate fabric requirements, add an extra inch to your desired finished size to allow for hemming. For example, if you want a 22-inch square bandana, cut your fabric to 23 inches square. This extra allowance ensures you have enough fabric to create clean, finished edges.
Adding Personal Touches
Consider adding embroidery, appliqué, or fabric paint to incorporate names, dates, or special designs. These techniques allow you to create one-of-a-kind pieces perfect for gifts or commemorative items.
Embellishments like beads or tassels can add texture and visual interest to your bandana. Attach these securely to ensure they withstand regular use and washing. For a professional touch, consider adding a custom label or tag with care instructions.
Monograms or logos are another great way to personalize your bandana. These can be added using embroidery machines, iron-on transfers, or fabric markers. When incorporating logos, ensure you have the right to use any copyrighted designs.
Cutting and Preparing the Fabric
Accurate cutting is crucial for creating a professional-looking bandana. Taking the time to properly measure, mark, and cut your fabric will ensure that your finished product looks polished and sits correctly when worn. Pay attention to the fabric’s grain, which is the direction of the weave. Cutting along the grain helps your bandana maintain its shape and prevents unwanted stretching or distortion.
Before cutting, consider pre-washing your fabric. This step is especially important for natural fibers like cotton, which may shrink after the first wash. Pre-washing ensures that your bandana will maintain its size and shape after repeated use and cleaning.
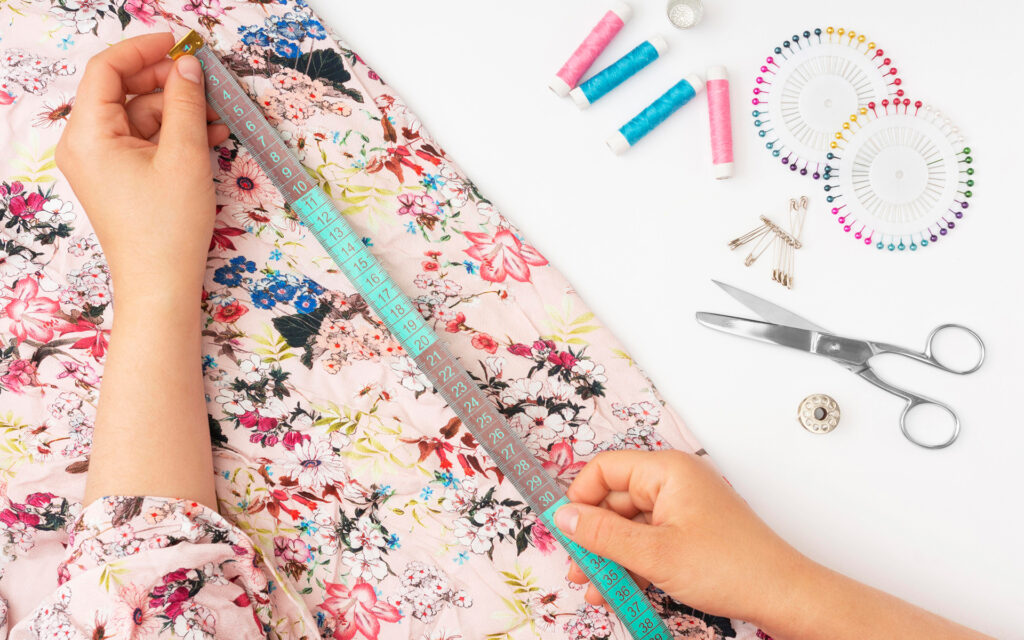
Measuring and Marking
Start by laying your fabric on a flat surface, ensuring it’s smooth and free of wrinkles. Use a clear ruler and fabric marker to measure and mark your cutting lines. For a square bandana, measure equal distances on all sides. If you’re creating a triangular bandana, mark a square and then draw a diagonal line from corner to corner.
Remember to add seam allowances when marking your fabric. A standard 1/4 to 1/2 inch allowance works well for most bandana projects. Double-check your measurements before cutting to avoid costly mistakes.
Cutting Techniques
When it comes to cutting your fabric, you have two main options: scissors or a rotary cutter.
Fabric scissors offer precision and control, especially when working with intricate shapes or patterns. A rotary cutter, used in conjunction with a cutting mat and clear ruler, is excellent for achieving straight, clean edges on larger pieces.
Whichever method you choose, ensure your cutting tools are sharp. Dull blades can lead to jagged edges and fabric fraying. When cutting, hold your fabric taut but don’t stretch it. This helps maintain the fabric’s shape and ensures accurate cuts.
If you’re working with a patterned fabric, pay attention to pattern alignment. For symmetrical designs, you may want to center the pattern on your bandana. For repeating patterns, ensure they align properly at the edges for a cohesive look.
Pre-washing Considerations
Pre-washing your fabric helps prevent shrinkage and color bleeding after your bandana is completed. The pre-washing method depends on your fabric type:
For cotton and other natural fibers, wash in warm water and dry as you would the finished bandana. This ensures maximum shrinkage occurs before cutting.
Silk and delicate fabrics may require hand washing or dry cleaning. Always check the fabric care instructions before pre-washing. Synthetic fabrics like polyester typically don’t shrink but may still benefit from pre-washing to remove any sizing or chemicals used in manufacturing.
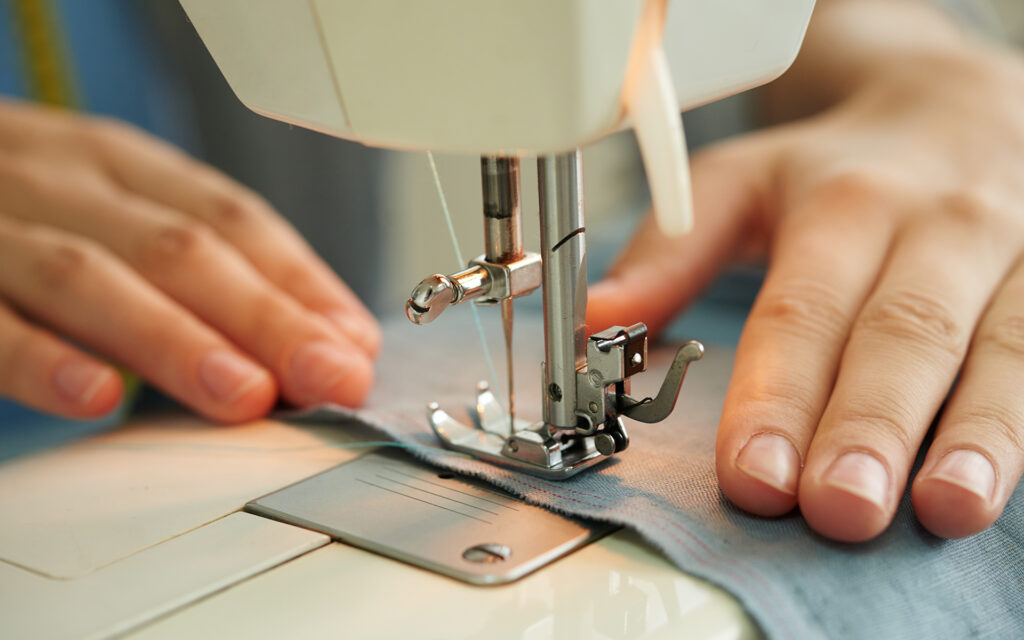
Sewing Your Bandana
With your fabric cut and prepared, it’s time to start sewing your bandana! The key to a professional-looking result is straight, even stitching. Take your time and use guides on your sewing machine or mark sewing lines on your fabric to ensure accuracy.
There are several finishing options for bandana edges, from simple machine-stitched hems to more decorative hand-rolled edges. Choose a method that complements your fabric and design while considering the bandana’s intended use and your sewing skill level.
Hemming the Edges
The most common method for finishing bandana edges is a simple rolled hem. To create this:
- Fold the edge of your fabric under by about 1/4 inch and press.
- Fold again by another 1/4 inch, encasing the raw edge, and press.
- Stitch close to the inner folded edge, removing pins as you go.
For a more polished look, consider mitered corners. This technique creates neat, diagonal folds at each corner, reducing bulk and creating a crisp finish. To create mitered corners:
- Fold and press a 1/4 inch hem on all sides.
- Unfold and trim about 1/4 inch off each corner at a 45-degree angle.
- Refold the hems, tucking the corners in to create a diagonal fold.
- Press and stitch, pivoting at each corner.
Adding Decorative Stitching
Many sewing machines offer a variety of decorative stitch options. Consider using a contrasting thread color to make your stitching stand out, or match your thread to the fabric for a subtle, elegant look.
Some popular decorative stitch ideas include:
- A simple zigzag stitch along the hem
- A scalloped edge using a specialty stitch
- Parallel rows of straight stitching for a quilted effect
When using decorative stitches, always test on a scrap piece of fabric first to ensure you’re happy with the appearance and that the stitch doesn’t distort your fabric.
Finishing Touches
Once you’ve completed the sewing, give your bandana a final press! Use an iron on the appropriate heat setting for your fabric, pressing from both sides for a crisp finish. Pay special attention to the edges and corners.
Trim any loose threads and secure any remaining thread ends by pulling them to the back of the bandana and tying off or weaving them into the stitching.
Consider adding a care label to your bandana, especially if you plan to give it as a gift. You can create custom labels or use pre-made fabric labels that can be sewn into a corner of the bandana.
How Ricoma Can Elevate Your Bandana-Making Experience
Our state-of-the-art sewing machines offer precision stitching and a wide range of design possibilities, allowing you to add intricate patterns, logos, or personalized text to your bandanas!