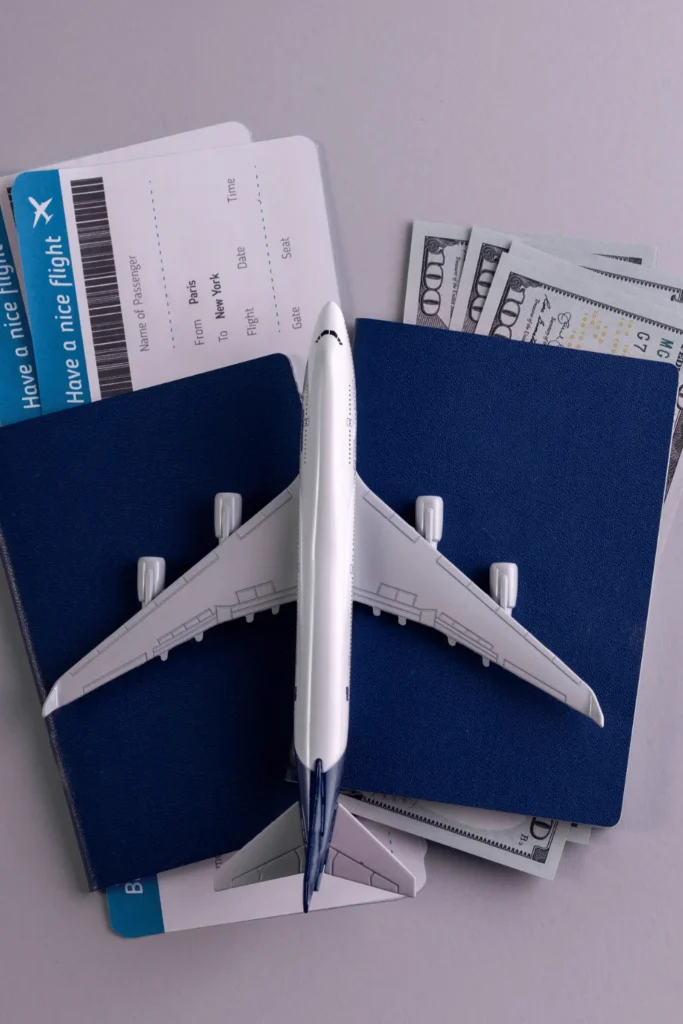
Imagine the delight of pulling out a personalized passport holder that showcases your favorite destination or a quirky design that makes you smile every time you see it.
That delight is why so many DIY enthusiasts love the idea of creating their own DIY passport cover! Aside from aesthetics, custom passports make it easy to spot your passport in a pile of identical booklets, potentially saving you time and stress at busy check-in counters.
Plus, they provide an extra layer of protection for one of your most important travel accessories. Let’s face it: a well-traveled passport can take quite a beating. A custom cover helps keep it in good condition, ensuring your customized travel gear remains readable and functional for years to come.
Creating your passport cover with your own printing or embroidery machines is also a fantastic way to express your personality.
Whether you’re into minimalist designs, vibrant patterns, or unique passport cover ideas, your cover can be a conversation starter and a memento of your journeys. It’s like wearing your travel experiences on your sleeve – or in this case, carrying your stylish travel accessories in your pocket!
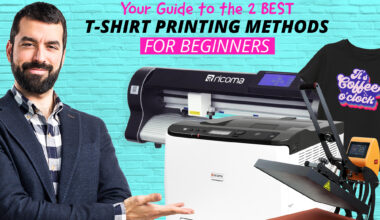
Choosing Your Design Method for Your Passport Wallet
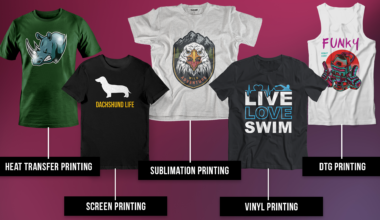
DTF (Direct-to-Film) Printing
DTF printing is a relatively new player in the custom printing game, but it’s making waves for good reason. This method involves printing your design onto a special film, which is then transferred onto your passport cover material using heat and pressure. The result? Vibrant, detailed designs that can handle intricate patterns and photorealistic images with ease.
One of the biggest advantages of DTF printing is its versatility. It works well on a wide range of materials, including leather, fabric, and synthetics. This means you’re not limited in your choice of passport cover material. DTF prints are also known for their durability and wash-resistance. Your design won’t fade or peel easily, making it perfect for a well-used passport cover.
DTG (Direct-to-Garment) Printing
DTG printing is like having a high-quality inkjet printer for fabric. This method prints designs directly onto the passport cover material, resulting in soft, photo-quality prints that feel like part of the fabric. It’s particularly great for designs with lots of color gradients or photographic elements.
While DTG shines on fabric materials, it can be a bit trickier on leather or synthetic materials. However, for fabric passport covers, it’s hard to beat the soft hand feel and detailed prints that DTG offers. Another plus? DTG is cost-effective for small batches, making it ideal if you’re just making one or a few custom covers.
Embroidery
For a touch of luxury and texture, embroidery is hard to beat. This method involves stitching your design directly onto the passport cover material using colored threads. The result is a raised, tactile design that exudes quality and craftsmanship.
Embroidered designs are incredibly durable – they can withstand years of use without fading or peeling. They also add a premium, textured look that sets your passport cover apart. However, embroidery does have some limitations. Complex color blending can be challenging, and very intricate details might be lost in the stitching process. But for bold, graphic designs or text, embroidery can create a stunning, long-lasting result.
Selecting the Right Material for Your Passport Cover
The material you choose for your passport cover is just as important as the design itself. It affects not only the look and feel of your cover but also how well it protects your passport and how it interacts with your chosen printing or embroidery method. Let’s explore some popular options.
Leather Options
Leather is a classic choice for passport covers, and for good reason. It’s durable, ages beautifully, and has a luxurious feel that’s hard to beat. When it comes to leather, you’ve got options like full-grain (the highest quality, showing natural markings) and top-grain (slightly more uniform in appearance).
Leather passport covers offer excellent protection and can last for years with proper care. They develop a beautiful patina over time, making each cover unique to its owner. However, printing on leather requires special considerations. DTF printing tends to work well, while DTG might not be the best choice. Embroidery can look stunning on leather but needs to be done carefully to avoid weakening the material.
Fabric Choices
Fabric passport covers offer a world of possibilities. Popular choices include canvas, linen, and cotton. These materials are lightweight, washable, and come in a variety of textures and weights. Fabric covers are great if you want something that’s easy to clean and can showcase detailed, colorful designs.
Different fabrics interact differently with printing and embroidery methods. Cotton and canvas tend to work well with all three methods we’ve discussed. Linen can create a beautiful, textured background for prints or embroidery but may require special handling during production.
For the eco-conscious traveler, there are also plenty of sustainable fabric options. Organic cotton, recycled polyester, or even innovative materials like fabric made from recycled plastic bottles can be great choices for an environmentally friendly passport cover.
Synthetic Materials
Synthetic materials like polyester, nylon, or faux leather offer their own set of benefits. They’re often water-resistant, highly durable, and cost-effective. These materials can be a great choice if you’re looking for a passport cover that can stand up to all kinds of travel conditions.
Synthetic materials generally perform well with DTF and DTG printing, producing vibrant, long-lasting designs. Embroidery can also work well, especially on sturdier synthetic materials. However, it’s worth noting that some synthetic materials may not have the same luxurious feel as leather or natural fabrics.
Step-by-Step Guide to DTF Printing Your Passport Cover
DTF printing is a two-step process: first, your design is printed onto a special film, and then it’s transferred onto your passport cover material. Here’s an overview of what you’ll need: a DTF printer, DTF inks, DTF film, DTF powder, and a heat press. You’ll also need your prepared design file and, of course, your passport cover material.
Setting Up Your DTF Printer
Before you start printing, you need to make sure your DTF printer is properly set up. Begin by loading the DTF ink cartridges – these are specially formulated inks that bond well with the transfer film. Next, load your roll of DTF film into the printer. Make sure it’s aligned correctly to avoid any printing mishaps.
Proper printer settings are crucial for DTF printing. You’ll want to set the print quality to the highest setting for best results. It’s also important to calibrate your printer to ensure accurate colors. Many DTF printers come with built-in calibration tools, so consult your printer’s manual for specific instructions.
Before printing your final design, it’s always a good idea to do a test print. This allows you to check that your colors are coming out correctly and that the design is properly aligned on the film. It’s much better to catch any issues at this stage rather than after you’ve transferred the design to your passport cover!
Applying the Design to the Cover Material
Once your design is printed on the film, it’s time to transfer it to your passport cover material. Start by applying a layer of DTF powder to the printed side of the film. This powder helps the design adhere to the cover material during the heat transfer process.
Next, place your passport cover material on the heat press. Position your powder-coated film on top, with the design facing down onto the material. The exact settings for your heat press will depend on your specific material, but generally, you’ll want a temperature around 330°F (165°C) and medium pressure for about 15 seconds.
After pressing, carefully peel away the film while it’s still warm. You should see your design now beautifully transferred onto your passport cover material. Allow it to cool completely before handling.
For best results, it’s important to follow the proper curing process. This usually involves pressing the design again without the film, which helps set the ink into the material. Follow the recommendations for your specific DTF powder and material.
If you encounter any issues, like parts of the design not transferring properly, you might need to adjust your heat press settings or the amount of powder you’re using.
Step-by-Step Guide to DTG Printing Your Passport Cover
DTG printing is a direct process where the ink is applied straight onto your passport cover material. For this method, you’ll need a DTG printer, DTG inks, a pretreatment solution (for dark materials), and a heat press for curing. Of course, you’ll also need your design file and passport cover material.
Preparing Your DTG Printer
Start by giving your printer a thorough cleaning – this helps prevent any clogged nozzles or other issues that could affect print quality. Next, load your DTG inks. These are specially formulated to bond well with fabric and other materials.
If you’re printing on a dark material, you’ll need to pretreat it first. This involves applying a special solution that helps the white ink (which acts as an underbase) adhere properly. You can do this manually with a spray bottle or use an automatic pretreating machine for more consistent results.
Calibrate your printer to ensure accurate colors. Most DTG printers have built-in calibration tools, so follow the manufacturer’s instructions. It’s also a good idea to do a nozzle check to make sure all your print heads are firing correctly.
When it comes to loading your passport cover material into the printer, proper placement is crucial. Many DTG printers come with specialized platens or jigs to help hold small items like passport covers in place. Make sure your material is smooth and wrinkle-free to avoid any print distortions.
Printing and Curing the Design
With everything set up, it’s time to print! Send your design file to the printer and start the printing process. DTG printing can take a bit longer than traditional screen printing, especially for detailed or colorful designs, so be patient.
Once the printing is complete, it’s time to cure the ink. This is typically done with a heat press. The exact settings will depend on your ink and material, but generally, you’ll want to press at around 330°F (165°C) for about 90 seconds. This process helps set the ink and improve its wash fastness.
After curing, allow your passport cover to cool completely before handling. Once it’s cool, you can check the print quality. The ink should feel soft to the touch and be well-adhered to the material.
For care instructions, it’s best to avoid washing your DTG-printed passport cover if possible. If cleaning is necessary, spot clean gently or hand wash in cold water. Avoid harsh scrubbing or high heat, as these can potentially damage the print.
If you encounter any issues like faded colors or poor ink adhesion, you might need to adjust your pretreatment process, ink levels, or curing settings. DTG printing can require some trial and error to get perfect results.
Step-by-Step Guide to Embroidering Your Passport Cover
Embroidery adds a premium, textured look to your passport cover. For this method, you’ll need an embroidery machine, embroidery threads, stabilizer, and of course, your digitized design file and passport cover material. Let’s walk through the process.
Hooping the Material
Proper hooping is crucial for achieving high-quality embroidery. Cut a piece of stabilizer slightly larger than your hoop. This helps keep your material flat and prevents distortion during embroidering. The type of stabilizer you use will depend on your material – for example, a tear-away stabilizer works well for most fabrics, while a cut-away stabilizer is better for stretchy materials.
Place your stabilizer in the hoop first, then carefully position your passport cover material on top. Make sure it’s smooth and taut, but be careful not to stretch it. For leather or synthetic materials, you might need to use adhesive spray to keep the material in place, as these can’t be hooped traditionally.
Aligning your design within the hoop is important. Most embroidery machines have alignment tools or on-screen positioning features to help with this. Take your time to get it right – it’s much easier to adjust now than to try and fix a misaligned design later!
Running the Embroidery Machine
With your material hooped and your design loaded into the machine, you’re ready to start embroidering. Begin by doing a trace of the design – this shows you the outer boundaries of where the machine will stitch, helping ensure your design is positioned correctly.
As the machine starts stitching, keep an eye on the process. Watch for any issues like thread breaks or looping. Most machines will stop automatically if they detect a problem, but it’s good to stay alert.
For multi-color designs, you’ll need to change threads as the machine progresses through different parts of the design. Follow your machine’s prompts for when to switch colors. When changing threads, be sure to clip the old thread close to the needle to avoid any loose ends in your finished design.
Once the embroidery is complete, carefully remove the passport cover from the hoop. Gently tear away any excess stabilizer (for tear-away types) or carefully cut away cut-away stabilizer, being careful not to cut your stitches or material.
Finally, give your embroidered passport cover a light press with an iron (use a pressing cloth to protect the embroidery) to smooth out any hoop marks or slight puckering around the design. Trim any loose threads, and your custom embroidered passport cover is ready to use!
DIY Your Life With Ricoma!
Ricoma offers a range of sewing, embroidery and printing solutions perfect for this project and so much more. Our user-friendly machines and top-notch support make it easy to create professional-quality custom items, whether you’re a seasoned pro or just starting out. Explore all our machines and start creating your own customized products!