Are you thinking of starting or expanding your custom apparel business to include printing but don’t know which method to choose?
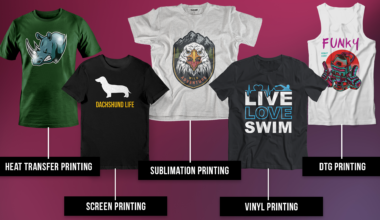
Continue reading for a full list of the most popular printing methods along with the equipment, materials, costs, and pros and cons of each one. Below are the five most common methods we will cover:
- Heat Transfer (White Toner)
- Sublimation
- Heat Transfer Vinyl (HTV)
- Direct to Garment (DTG)
- Screen Printing
1. Heat Transfer (White Toner)
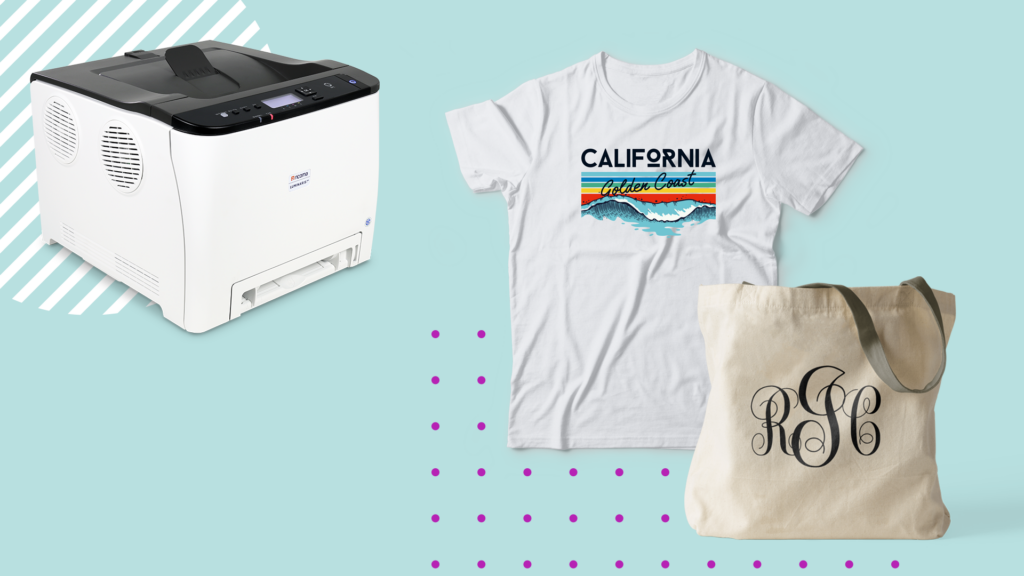
Heat transfer, sometimes known as 2-step heat transfer, is a printing method where you begin by printing an image onto specialized paper using a white toner transfer printer. After printing the image, you would utilize a heat press to heat transfer the image onto a surface.
Click here to get the perfect transfer every time with a Ricoma heat press!
Before you can heat transfer the image onto a surface, you must first print the design onto a transparent transfer sheet. The second step is to use a heat press to transfer the image from the transparent sheet onto an adhesive sheet. That is why this method is referred to as “2-step” heat transfer.
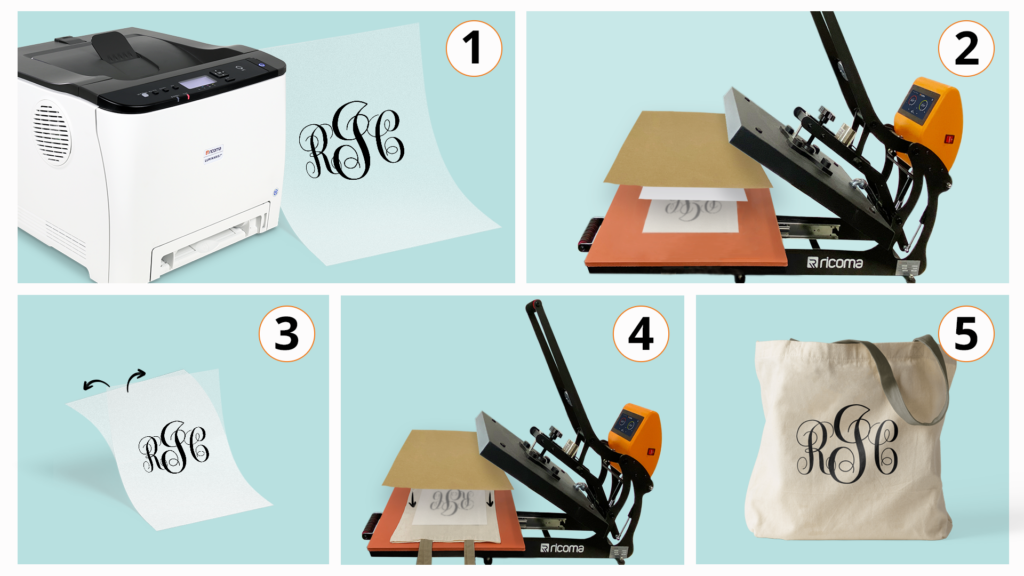
The Luminaris 200‘s configurations allow it to print at a higher quality than other printers by utilizing white toner to make designs stand out on any surface. To see the different configurations in action for yourself, you can schedule a Free Virtual Demo with our team of highly trained technicians.
The heat transfer method can be used to decorate many soft substrates such as garments and accessories of various materials, including cotton, polyester and more. It is also capable of decorating hard substrates such as ceramic, metal, wood and more.
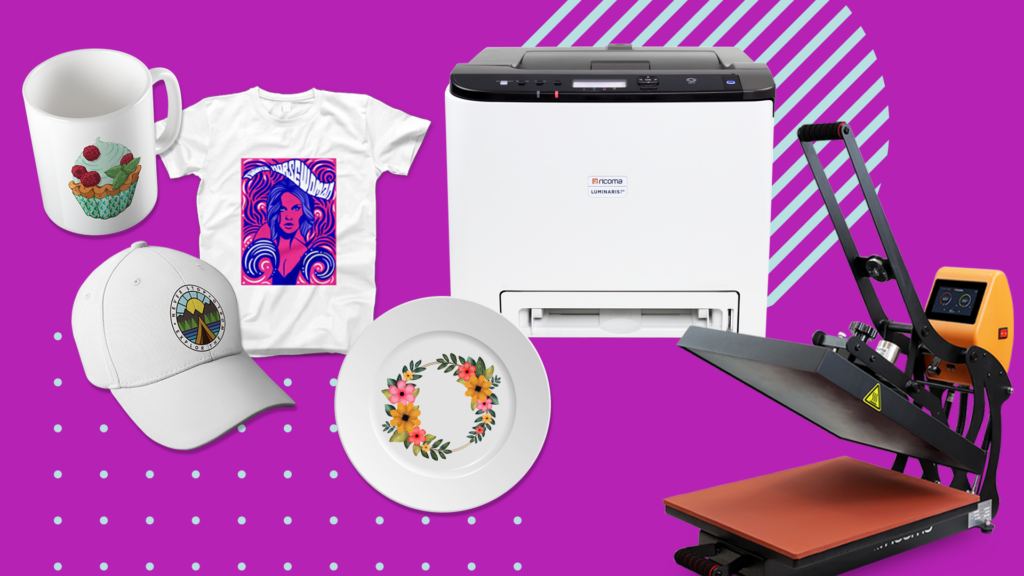
Because this method is able to decorate so many different items, materials and colors, it is considered to be the most versatile printing method.
Below is a list of the pros and cons for this method.
Pros
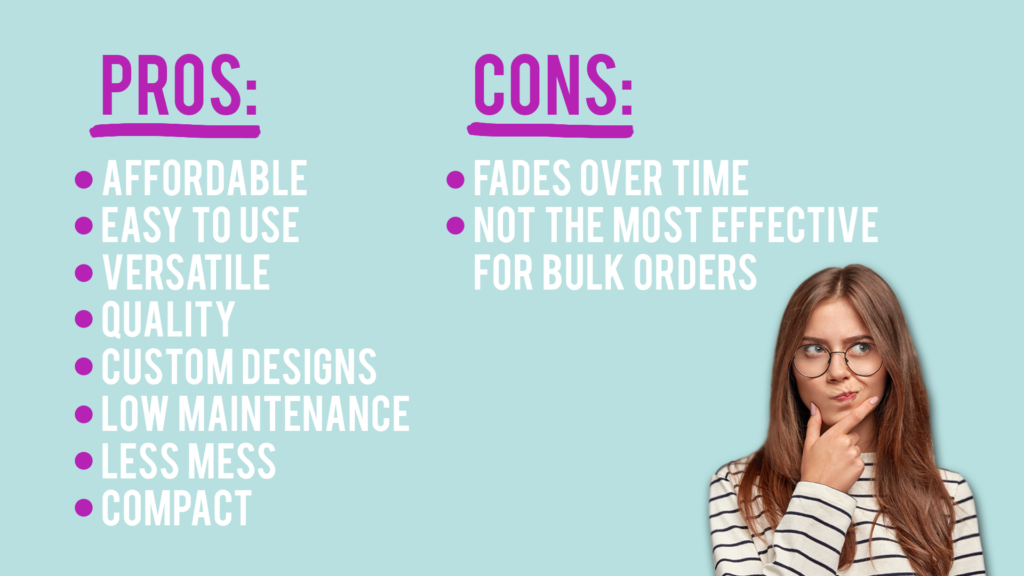
Affordable: Whether you are printing your designs in-house on a white toner transfer printer, like the Luminaris 200, or are purchasing them online and then simply pressing them with a heat press, the equipment and materials required are lower in cost compared to other printing methods such as screen-printing or DTG.
Easy to use: Printing the design on a transfer sheet and then pressing it with a heat press are achieved in a few simple steps, making this method very popular with beginners.
Versatile: Unlike sublimation printing, this method is not limited by materials as the designs on the transfer sheets can be transferred onto a variety of surfaces such as cotton, polyester, poly blends and so on, as well as a variety of colored surfaces. This process is also not limited to the items it can transfer onto as long as there is a heat press available to press the design onto the item.
Quality: With heat transfer, although the print rests on top of the garment or substrate rather than merging with it as with sublimation, the quality is still impressive and can last around 50-60 wash cycles. And because heat transfer is not limited by the colors that you can print, you can achieve vibrant full-color prints on any fabric or color.
Custom designs: Most heat transfer printer software, including the LuminRIP software that comes free with the Luminaris 200 printer, allows you to fully customize your artwork directly in the software. With LuminRIP, you can manipulate graphics, remove colors, add graphic effects and queue up multiple print jobs. You are also able to print graphics larger than the standard A4 print size by cutting the graphic in the software and printing it across multiple sheets.
Low maintenance: Heat transfer printers like the Luminaris require very little maintenance and are comparable to regular office printers.
Less mess: The printing and heat transfer process onto garments and other substrates is mess-free.
Compact: Since this process only utilizes a small printer and a heat press, all of the materials and supplies can fit onto a standard table.
Cons
Fading or cracking: Graphics are not permanently bonded with the substrate as with sublimation. The graphics will rest on top of the substrate, which means that it will eventually crack or peel as with most printed garments.
Not the most effective for bulk orders: Although heat transfer printing software allows you to print multiples of designs onto one transfer sheet, you will still need to heat press one design at a time, which does not make this method as effective for bulk orders.
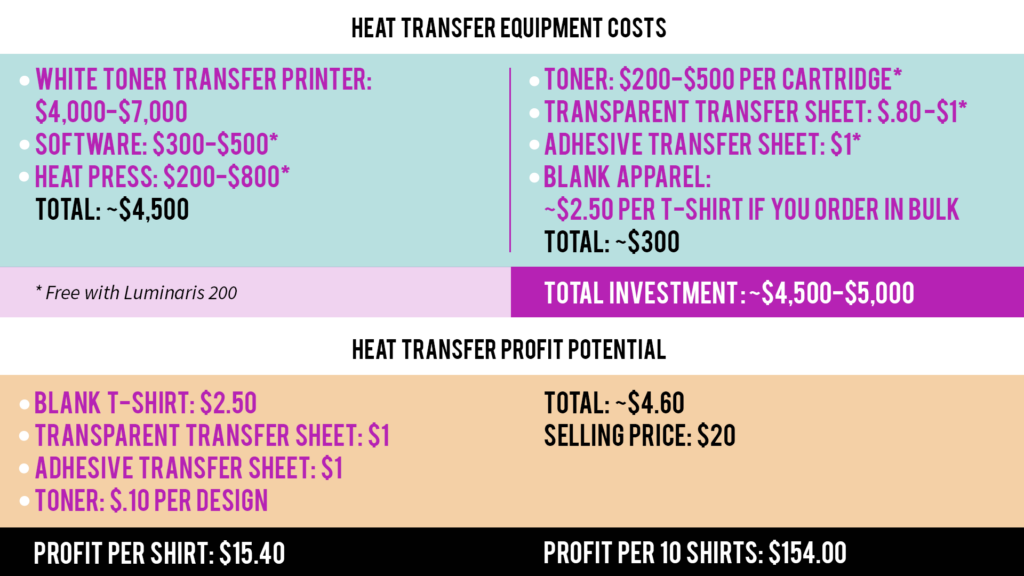
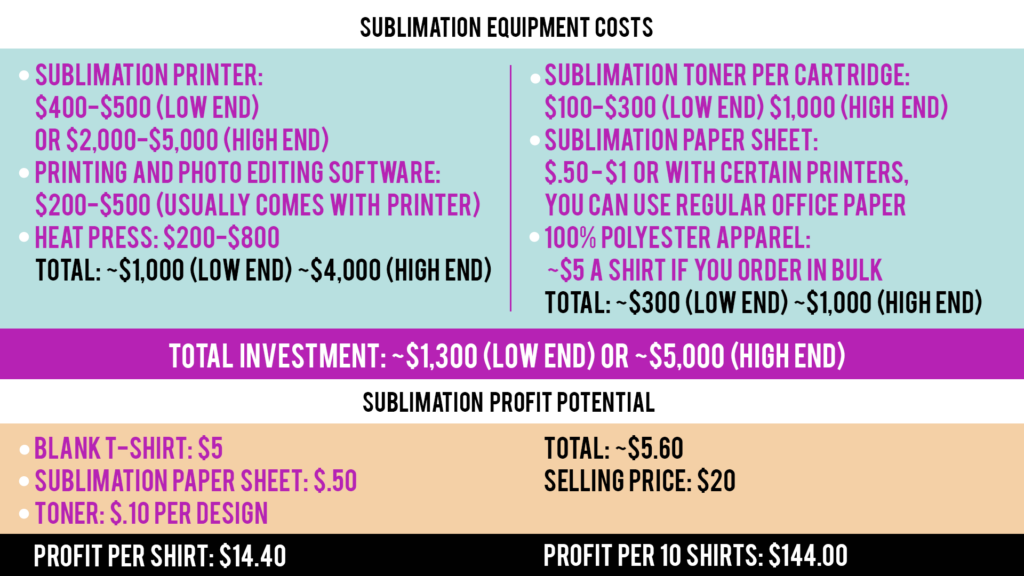
In the section below, we’ll cover the equipment and materials that are required for this method and break down the costs and profit potential.
2. Sublimation
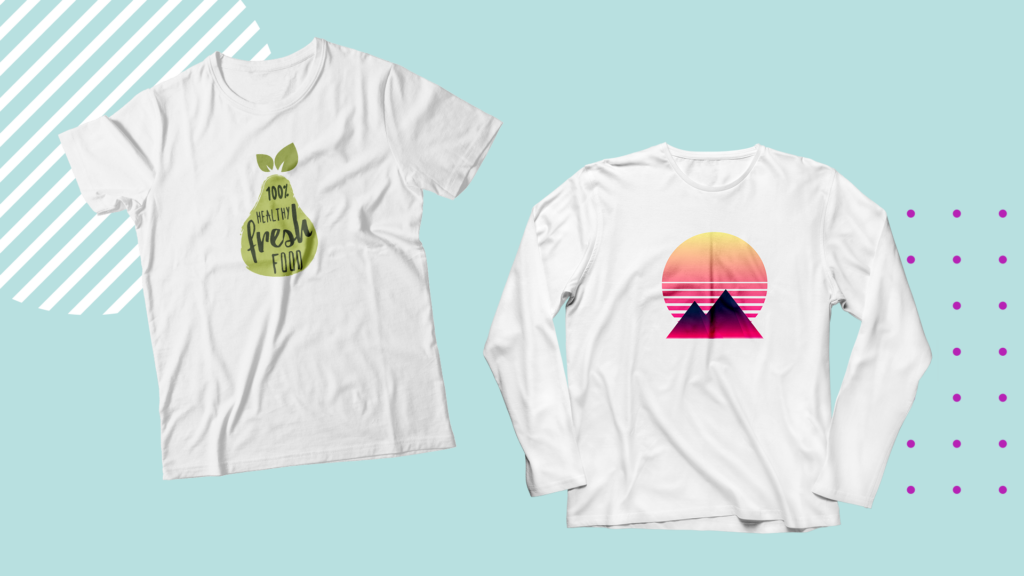
Sublimation is the only apparel printing method that creates a permanent bond between the ink or toner and the fabric.
This is done through a process called dye-sublimation. During the process, the special sublimation ink is turned into a gaseous liquid when it is heated and then solidifies again once it transfers onto a surface and cools down.
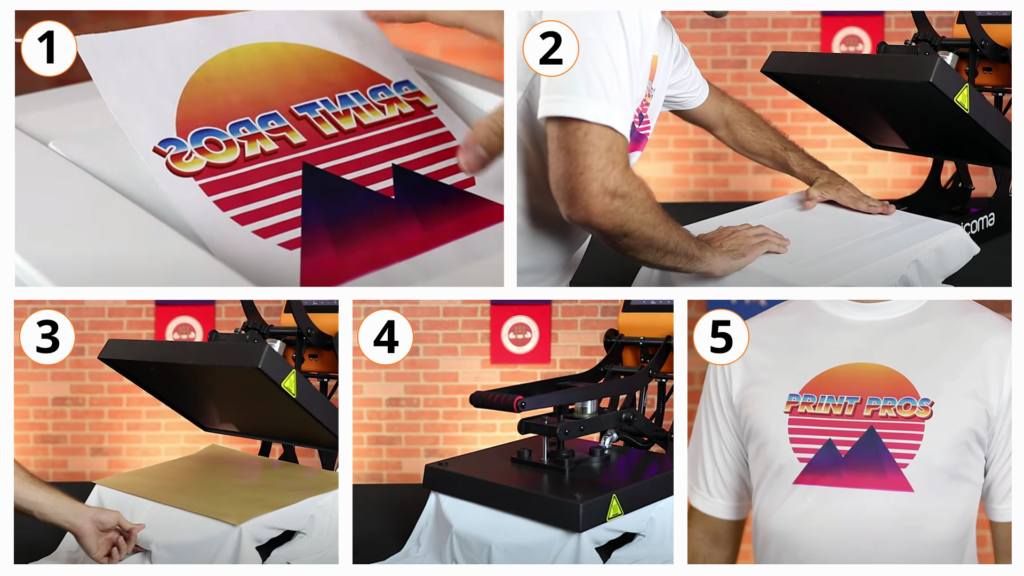
For this process to work, the substrate that you are printing on must be 100% polyester for soft substrates or poly-coated for hard substrates. The fabric or substrate must be white or a light color since the colors get absorbed into the substrate. As a result, the colors will not be visible on dark fabrics.
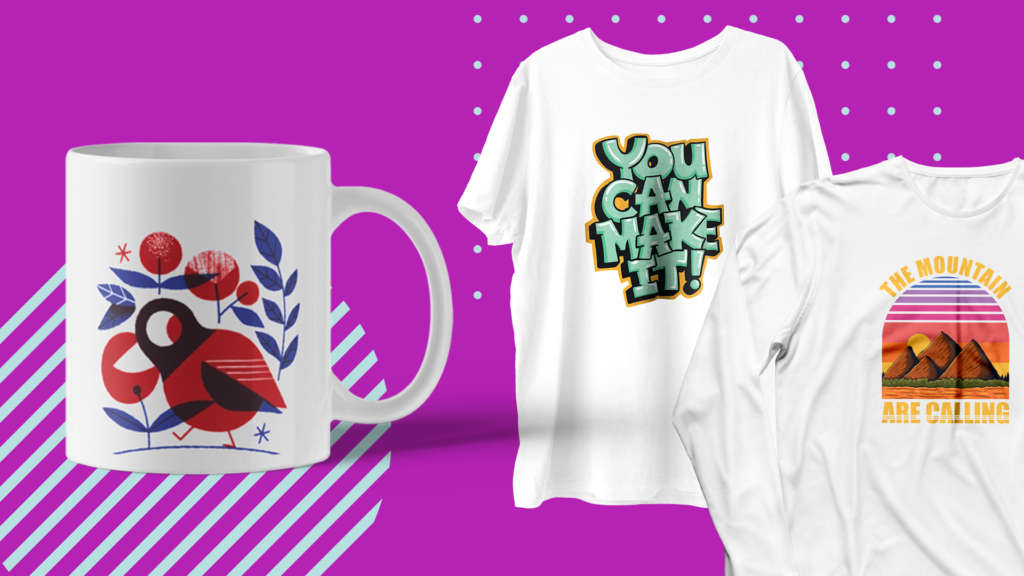
Sublimation printing can be achieved using ink or toner, depending on the type of printer. For example, some white toner transfer printers are versatile enough to accommodate sublimation printing and heat transfer printing all in one.
Below is a list of the pros and cons for this method.
Pros
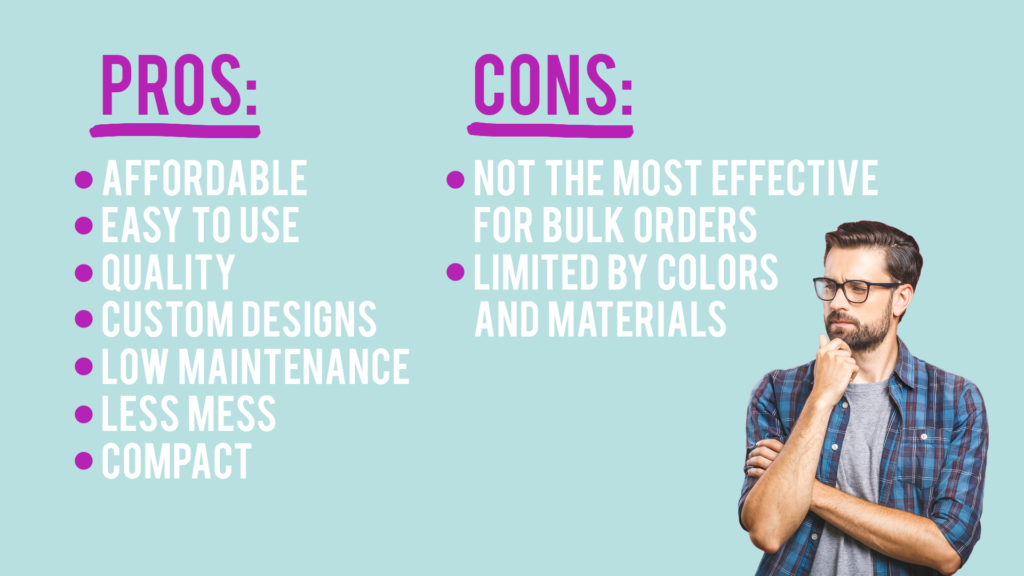
Affordable: The equipment needed to print sublimation is similar in price compared to heat transfer, especially if you are utilizing a white toner transfer printer that can achieve both processes.
Easy to use: Similar to heat transfer, printing the design onto specialty paper (in this case, sublimation paper) and then pressing the design with a heat press is achieved in a few simple steps. For this reason, sublimation is very popular with beginners.
Click here to get the perfect heat press for all your sublimation needs!
Quality: Sublimation printing offers the highest quality prints when printed on light-colored polyester garments or poly-coated surfaces as the prints bond with the substrate, creating a permanent bond that is resistant to cracking and fading for over 100 washes.
Custom designs: Sublimation printing does not limit your design capability as it allows you to transfer full-color designs onto substrates. The only drawback to this method is the limitation on the types of items that you are able to print on.
Low maintenance: Sublimation printers, whether they require ink or toner, are generally low maintenance and comparable to regular office printers.
Less mess: If the sublimation printer works with toner rather than inks, then the process will be less messy during maintenance. However, the printing and transfer process in general is mess-free.
Compact: Since this process only utilizes a small printer and a heat press, all of the materials and supplies can fit onto a standard table.
Cons
Not the most effective for bulk orders: Although you are able to print multiple designs onto one sublimation sheet, you will still need to heat press one design at a time, which does not make this method as effective for bulk orders.
Limited by colors and materials: This method is only possible on polyester garments or poly-coated materials that are white or a light color.
In the section below, we’ll cover the equipment and materials that are required for this method and break down the costs and profit potential.
3. Heat Transfer Vinyl (HTV)
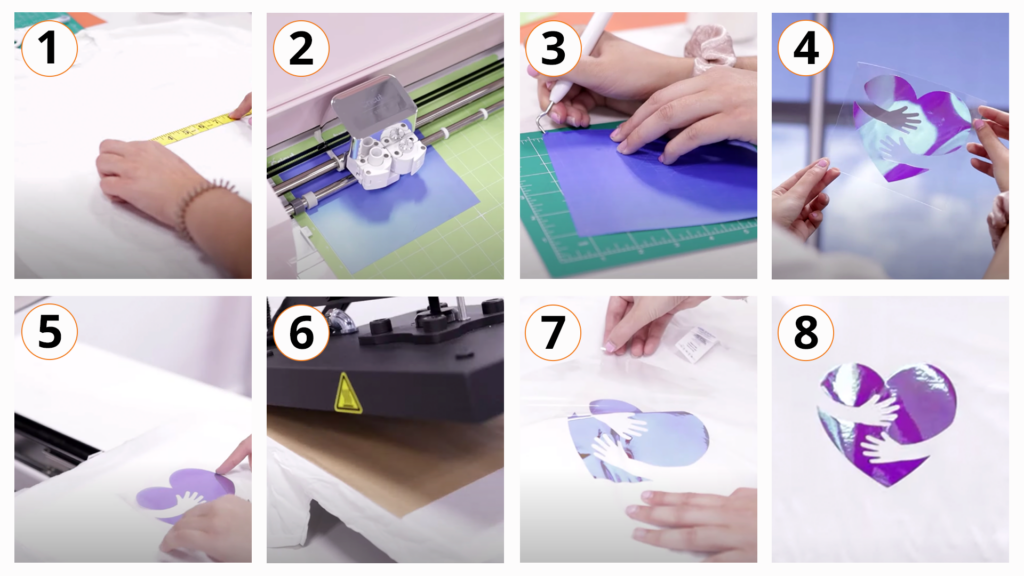
Heat transfer vinyl, or HTV for short, is a decoration method where you can create a design in specialized software and then use a vinyl cutter to cut out each color of the design, which you can then adhere to a garment in multiple layers using a heat press.
Click here to discover all the different types of heat presses available for apparel decorating.
Each design that is cut with the vinyl cutter will need to be “weeded” with a weeding tool to remove any excess vinyl that is not a part of the design.
To easily and quickly cut heat transfer vinyl, check out Ricoma’s line of vinyl cutters!
After applying the vinyl to the substrate, it will need to be cured with a heat press and left for about 24 hours before wearing or using.
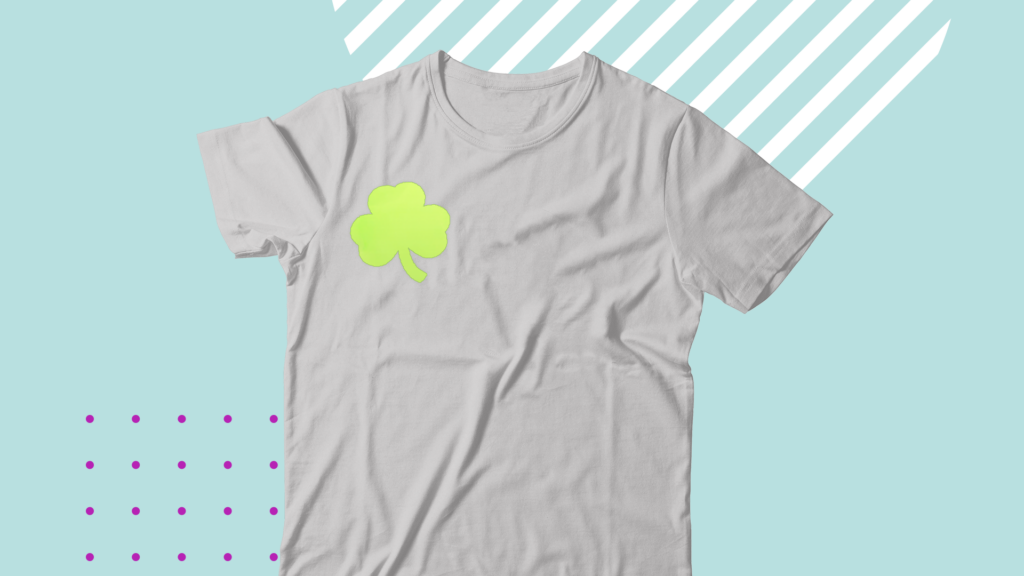
This method can be used to decorate many soft substrates such as garments and accessories of various materials, including cotton, polyester and more. It is also capable of decorating hard substrates such as ceramic, metal, wood and more.
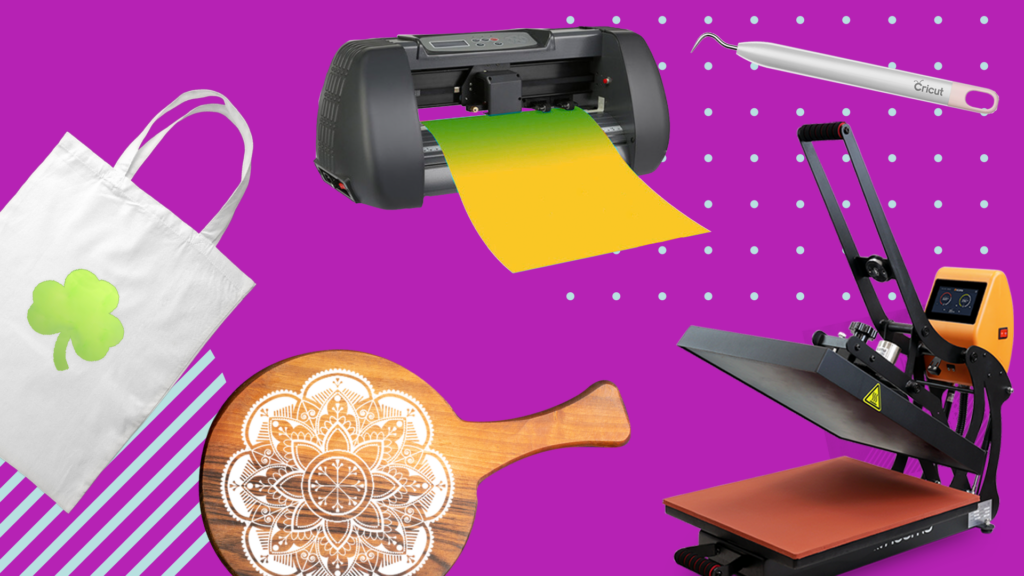
Because most of the materials are readily available in any craft store, HTV is one of the most accessible and cost-effective decoration methods on this list.
Below is a list of the pros and cons for this method.
Pros
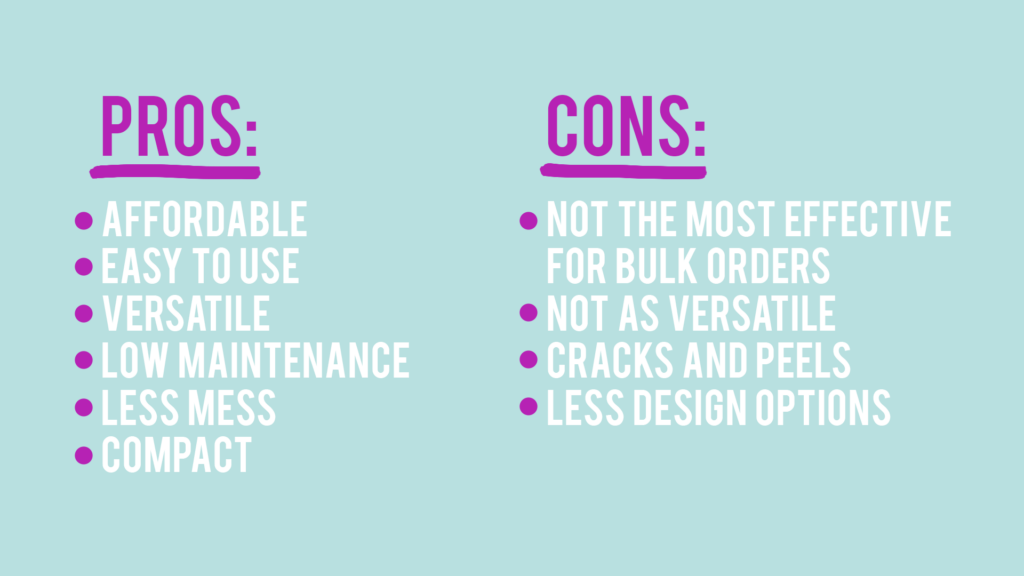
Affordable: HTV is the most affordable decoration method compared to the others on this list. Even though it requires a number of materials, software, and a vinyl cutter, these items are fairly inexpensive and can be found in most craft stores.
Easy to use: Because HTV is more affordable, beginner crafters and business owners prefer to use this method. Although simple, HTV is a bit more involved when compared to 2-step heat transfer and sublimation printing because of the weeding and layering process to achieve more than a single color on the design.
Versatile: This method is not limited by materials or substrates; however, it does not allow for full-color photorealistic designs like DTG, heat transfer or sublimation.
Low maintenance: Vinyl cutters require very little maintenance as they are not printers. They simply cut vinyl into shapes as indicated by the software.
Less mess: With vinyl, there are no messy inks, only the vinyl itself.
Compact: Since this process only utilizes a vinyl cutter and a heat press, all of the materials and supplies can fit onto a standard table.
Cons
Not the most effective for bulk orders: Not only does each design need to be cut and weeded, but each color of the design is a separate layer. So it will need to be cut and weeded separately, making this process more suitable for custom one-offs. Also, each design will need to rest for 24 hours after it is pressed before it can be worn or used.
Not as versatile: This method is not limited by materials or substrates; however, it does not allow for full-color photorealistic designs like DTG, heat transfer or sublimation.
Lower quality: Graphics are not permanently bonded with the substrate as with sublimation. The graphics are also not achieved through inks or toners, but rather by pressing vinyl onto a substrate, which can lead to eventual cracking and peeling.
Limited designs: When creating custom designs for clients, you will be limited to simple designs utilizing 3-5 colors as more would be tedious to cut, weed and apply.
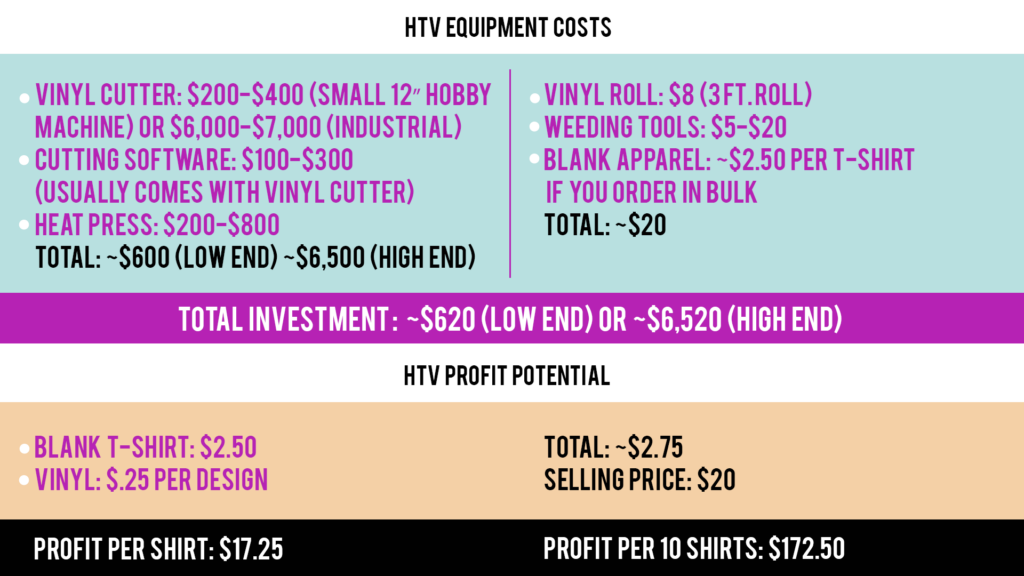
In the section below, we’ll cover the equipment and materials that are required for this method and break down the costs and profit potential.
4. Direct to Garment (DTG)

DTG, or direct to garment printing, is when you print a design directly onto a garment using a specialized printer as if you were printing a regular document.
In order for the ink to adhere to the fabric, the item must be pre-treated with a specialized coating and cured with a heat press beforehand.
Although this method is much newer than the others we will cover, it has become popular very quickly because of how easy it is to use.

A direct-to-garment printer like Ricoma’s Vision DTG is ideal for this method because it can print vibrant, full-color graphics directly on light and dark T-Shirts, jacket backs and more, in just minutes. You can see just how fast the Ri 1000 really is by scheduling a FREE Virtual Demo with us here.
Because this printer is constructed similar to a regular office printer, it is limited to only flatter garments. However, it is compatible with various platens that will allow you to print on sleeves and other harder-to-print flat surfaces.
The DTG method is capable of printing on light and dark colored fabrics that are 100% cotton and high-cotton blends; 100% light poly, up to 50/50 dark poly, wood and canvas.
Pros
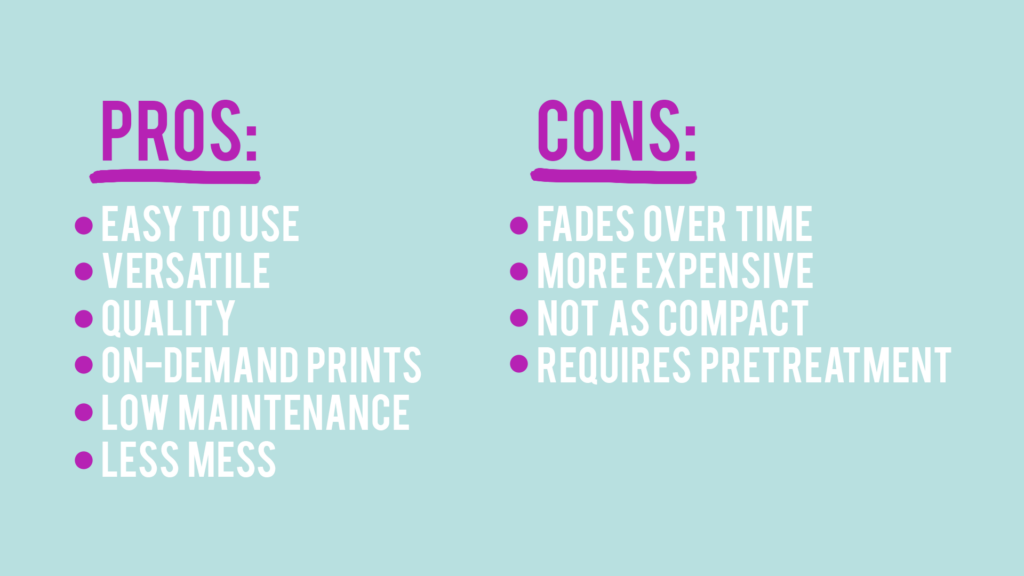
Easy to use: The pre-treatment method and printing method are fairly simple and straightforward with DTG, making it a good choice for beginners who are interested in on-demand printing.
Versatile: Compared to sublimation printing, DTG printing is not limited by most materials or colors, making it fairly versatile as long as you are printing on flat garments.
Quality: With DTG, although the print rests on top of the garment or substrate rather than merging with it as with sublimation, the quality is still impressive and can last over 80 wash cycles, making it more durable and higher quality than heat transfer or HTV prints. And because DTG printing is not limited by the colors that you can print, you can achieve vibrant, full-color prints on both light and dark garments.
On-demand prints: Unlike heat transfer, sublimation and HTV, DTG printers do not require additional set up for each design since it is printed directly on the garment rather than transferred onto it. You can program the DTG printer to queue up multiple designs and then simply change the garment between each print.
Low maintenance: While other DTG printers require more maintenance, the Vision DTG saves time by automating white ink agitation, performing self-cleaning functions, and continuously monitoring the ink supply and air levels. For maintenance functions that are not automated, the Vision DTG built-in Interactive Operation Guide alerts users, sending them reminders to complete necessary tasks. The result is a printer that is low-maintenance and ready to print at any time.
Click here to improve your efficency with our low-maintenance DTG printer, the Vision DTG!
Less mess: Aside from the pre-treatment process, which requires a specialized pretreatment spray to be applied onto the garments, the DTG printing process is mess free. There are a few different methods to apply pretreatment, which can ultimately limit the spray to a confined area if necessary.
Cons
Fading or cracking: Graphics are not permanently bonded with the substrate as with sublimation. The graphics will rest on top of the substrate, which means that it will eventually crack or peel as with most printed garments, but not to the extent of HTV or heat transferred prints.
More expensive: Compared to heat transfer, HTV and sublimation printing, DTG printers are generally more expensive because of the robust technology that allows the printer to print directly on the garment.
Not as compact: DTG printers are larger and heavier than heat transfer and sublimation printers. A sturdy work table would be required to hold this printer rather than a standard office desk.
Requires pretreatment: Although each garment will need to be pretreated prior to printing, the process is fairly simple as it only requires you to choose the pretreatment according to the color of garment you are printing on and then spraying the pretreatment in layers. You can also purchase pre-treated garments in advance to avoid this process, but you will be limited to the garments that you have purchased.
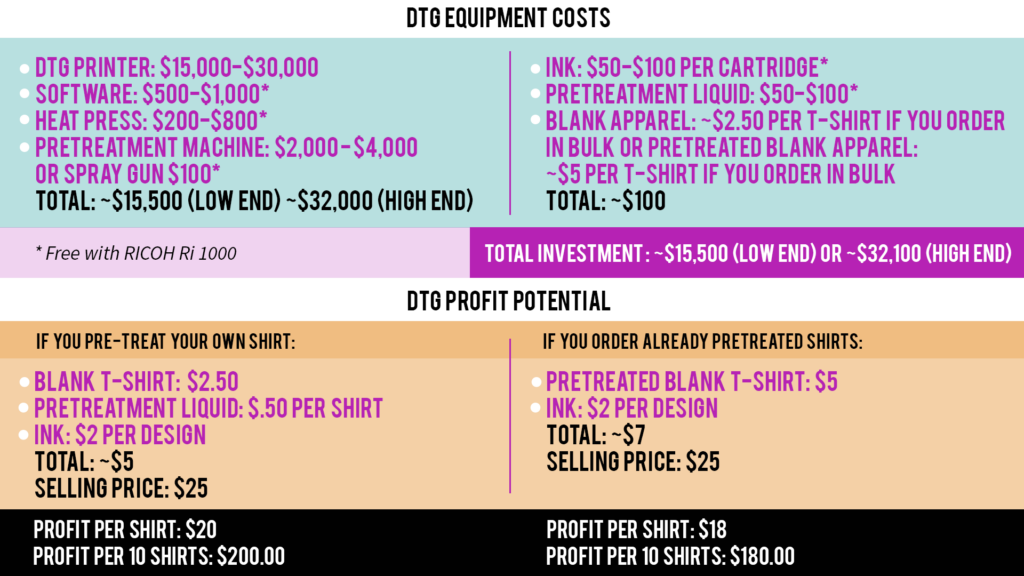
In the section below, we’ll cover the equipment and materials that are required for this method and break down the costs and profit potential.
5. Screen Printing
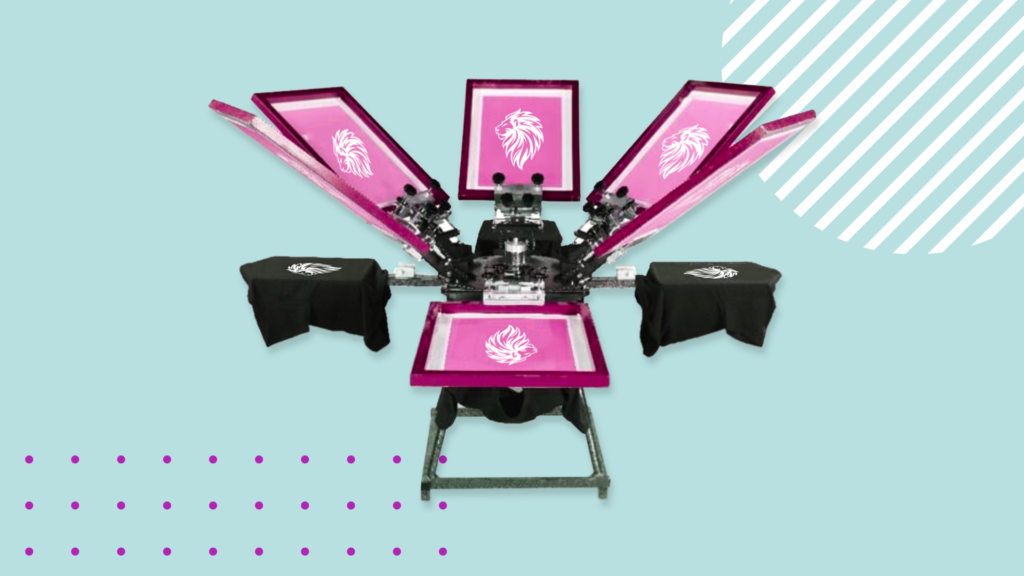
Screen printing is a popular printing method that is achieved by placing a pre-made screen onto a garment and applying ink through the screen using a squeegee if done by hand. If investing in an automatic screen printing machine, then the machine will push the ink through the screen for you.
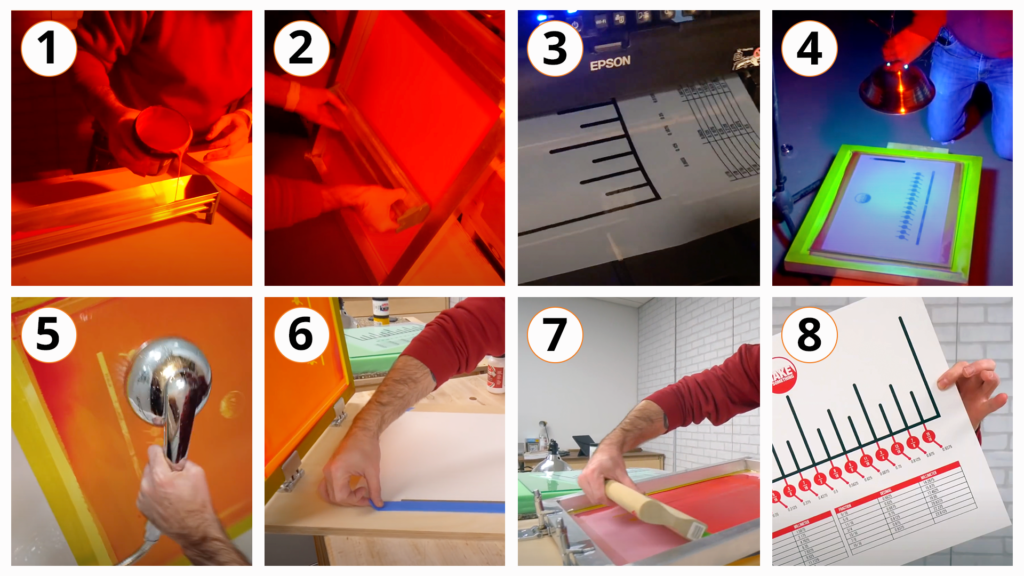
In order to make a design on a screen, you first need to mask off the area of the screen that you do not want your ink to penetrate. To do this, you will need to turn off the lights in the room and use darkroom lights for the next steps.
You will begin by first applying a photosensitive emulsion onto the back and front of the entire screen. Keep in mind that some emulsions are 2-part, which means that you will need to mix them together for it to become light sensitive. You will then need to wait until the screen dries.
Next, you will need to print a transparency sheet with your design using a photo printer and then place the sheet with your design on top of the screen upside down. After that, place a sheet of glass over the top of the entire screen and design and expose this to UV light for a period of time.
You will then rinse the screen to remove the emulsion from your design so that the ink can penetrate just that area. After you rinse the screen, you are able to turn the regular lights on rather than work with darkroom lighting.
If the design has multiple colors, a separate screen and transparency sheet will need to be created for each color.
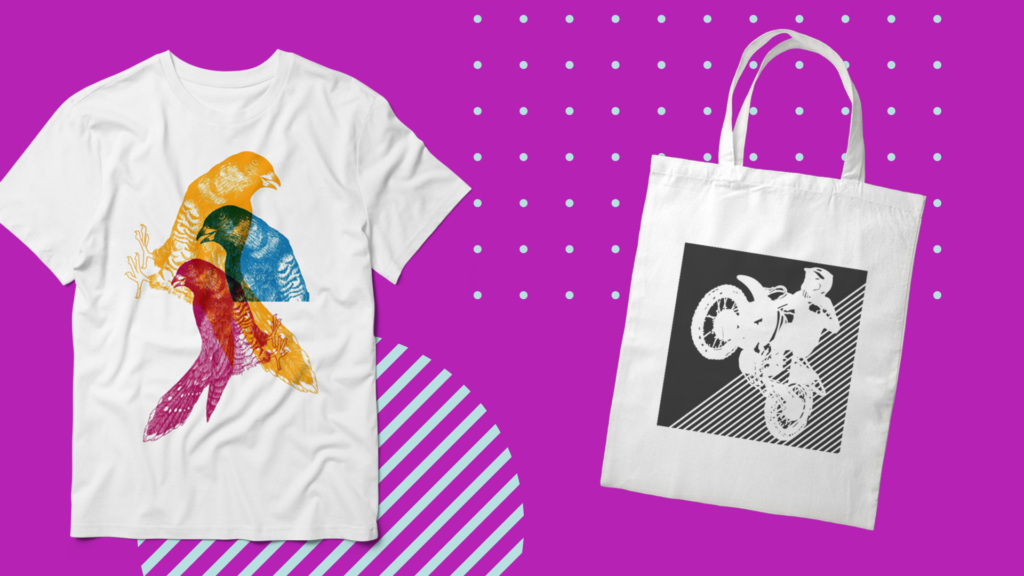
Screen printing can be used to apply ink to any smooth, flat surface, including garments, wood, glass and even metal.
Below is a list of the pros and cons for this method.
Pros
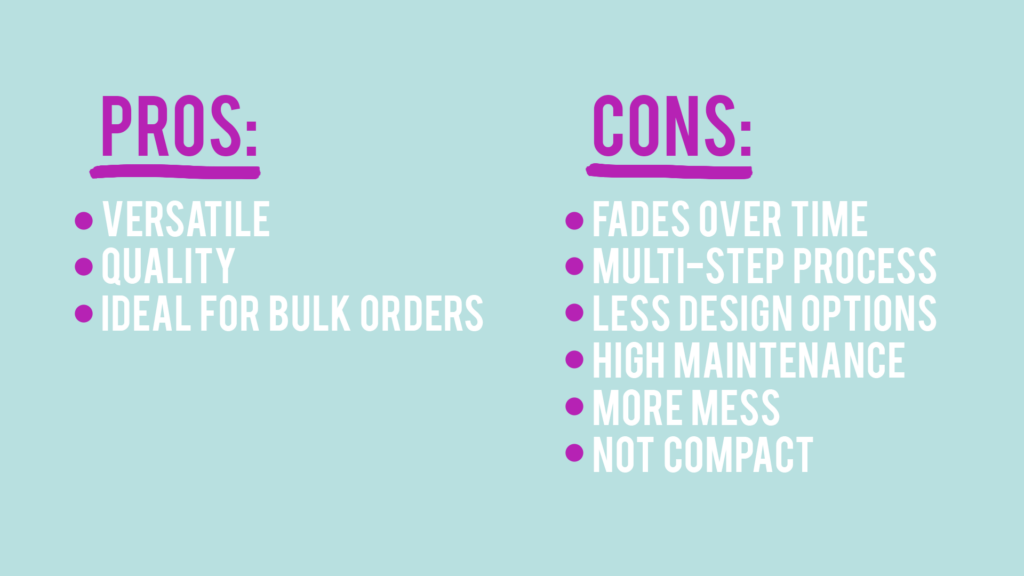
Versatile: This method is not limited by materials or colors, like with sublimation printing, and it is able to print on both hard and soft substrates. However, it is only able to print on flat items.
Quality: Although the ink sits on top of the garment, the quality is superior to heat transfer and HTV, and it will last about as many washes as DTG before fading or cracking.
Ideal for bulk orders: Because there is a lot of effort that goes into making each screen for each color of the design, it is wise to use the screens for multiple prints. Consequently, this method is ideal for very large batch runs, especially if you invest in an automatic screen-printing machine with multiple screens.
Cons
Fading: Graphics are not permanently bonded with the substrate as with sublimation. The graphics will rest on top of the substrate, which means that the design will eventually crack or as with most printed garments.
Multi-step process: As mentioned above, creating screens is a tedious process compared to the other printing methods mentioned here because of the number of steps that it takes. If this is a method that you want to invest in, it is recommended to try a DIY approach at home first to see if this process is worth the time for your business.
Limited designs: This method limits designs to a small number of colors since each color is applied in layers with separate screens. The process to create screens and then align the designs onto a substrate is all done by hand and can be tedious. Because of this, you are not able to create full color, photorealistic designs as with heat transfer, sublimation or DTG.
High maintenance: Although the printer itself is generally low maintenance, the cleaning process is the most tedious compared to the other methods because you have to manually apply the inks with screens.
More mess: As mentioned, this process is done by hand by pressing inks through a screen with a squeegee, which can be messy. Even if you are using an automatic machine, the inks will still need to be poured manually.
Not compact: Since this process requires a photo printer and multiple screens, most businesses that print in bulk will purchase an automatic multi-screen machine which takes up more space than the other methods.
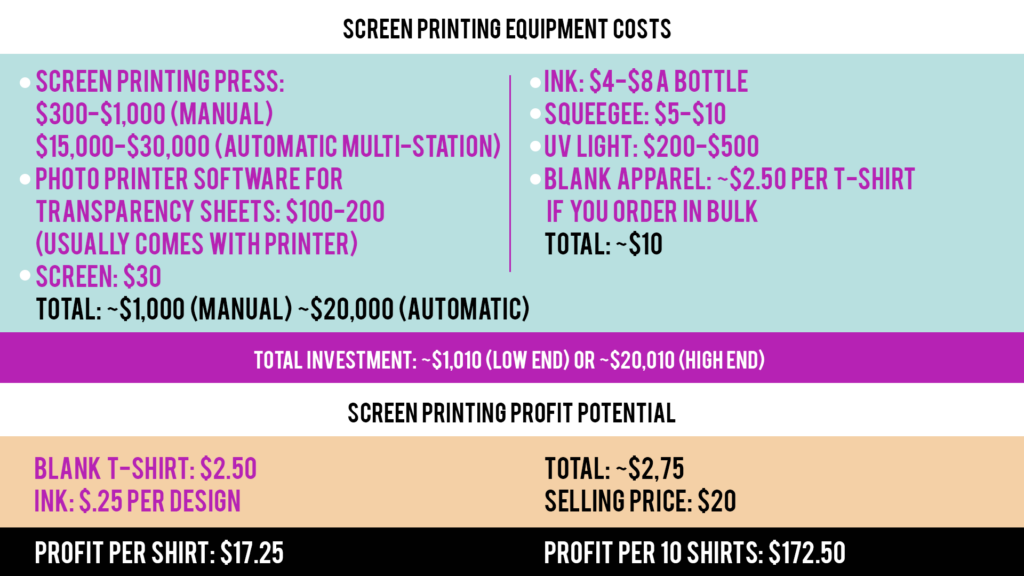
In the section below, we’ll cover the equipment and materials that are required for this method and break down the costs and profit potential.
Conclusion
With so many apparel decoration methods available, there is no one superior method. The method you end up choosing to start or expand your business will depend entirely on your needs and the type of business you want to create.
You can also take advantage of free virtual demos like the ones Ricoma provides so that you get a better idea of how different types of printing equipment work before you make a purchasing decision.
Be sure to weigh the pros and cons and consider all the costs that go into each of these methods before choosing the one that is right for you.
