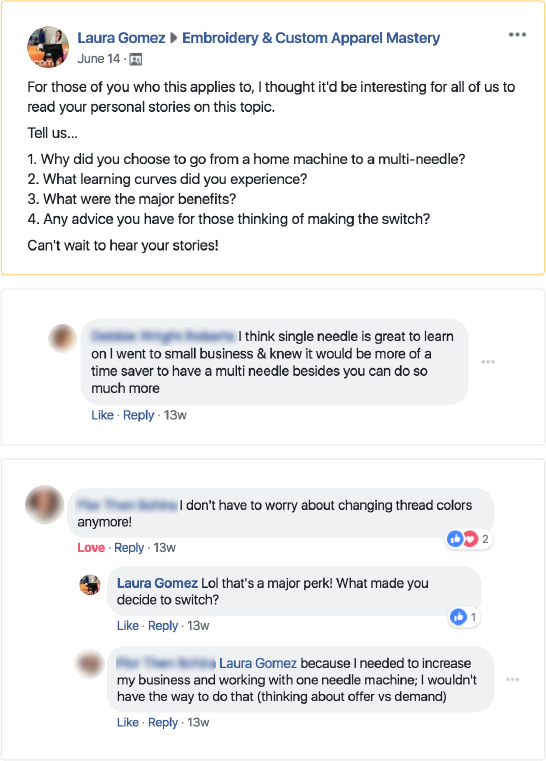
If you’re thinking of tapping into the business side of embroidery, your first question is probably something like…
“Where do I even begin!?”
Luckily, we’ve broken it down into a simple 7-step process for you.
In this article, you’ll learn what to do in each step of the process and discover some insider tips along the way. Let’s dive in!
Step #1: Define your ideal customer and learn his/her needs
Step #2: Find the right machinery
Step #3: Figure out your business costs
Step #4: Register your business
Step #5: Stock up on materials
Step #6: Create a pricing structure
Step #7: Create an online presence
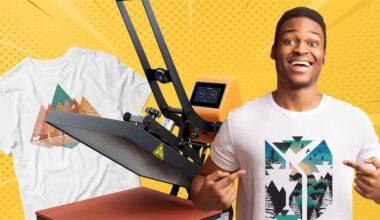
Click here to see what these 4 embroiderers created with their multi-needle machines.
Step #1: Define your ideal customer and learn his/her needs

When starting off, it’s important to begin with an idea of who your ideal customer is so you can stock up on the right materials and tools needed to serve that particular market.
Once you determine WHO your ideal customer is, figuring out what to sell them is second nature.
For instance, if you decide you want to tap into the fraternity/sorority market, you can easily determine the type of customized apparel they’ll need: caps, t-shirts, polo shirts, duffle bags for weekend-long mixers, sashes for formals, and so on.
Once you have an idea of who you want to sell to and what you want to sell, conduct some market research to find where your customers are and verify what their needs are.
Conducting market research can be as simple as logging on to social media and searching relevant hashtags to see what your customers are wearing and posting.
TIP: If you’re interested in the sorority market, visit the sorority’s website and/or social media. Take note of what they like to wear, the events they host and more. This will help you verify what your target customers need, rather than just assuming.
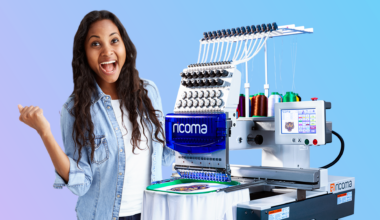
Step #2: Find the right machinery

Once you’ve narrowed down what types of items you’d like to sell, you’ll need the right machinery and tools to make it happen. To make the time you spend on labor worthwhile, you’ll need an efficient machine that allows you to quickly make your dollar back.
While single-needle machines are more accessible due to their inexpensive price tag, you’ll need a multi-needle to finish projects quickly enough to make a good profit. Otherwise, you’ll spend too much time on labor and not have enough time to pick up larger orders.
On a multi-needle, you can quickly embroider multi-colored designs within minutes. With a single-needle, you’ll have to constantly swap out the needle and run the machine at a slower speed. Not to mention, single-needles are not built for constant daily use, while multi-needles are built to last longer.
Click here to see what these 4 embroiderers created with their multi-needle machines.
TIP: When you’re choosing a machine, jot down a list of items you’d like to embroider and ask a product specialist if the machine can easily embroider these items. Some companies will also allow you to schedule a virtual demo to see your items being embroidered in real time.
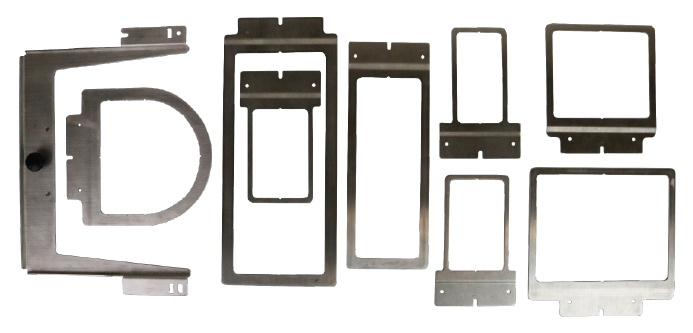
You may need to purchase some specialty hoops in order to embroider certain items. For instance, if you think you’ll need to constantly embroider thick materials, you may want to invest in a good pair of specialty hoops that will help you get the job done.
However, these tools are only available on multi-needle machines, which is another reason why it’s important to find the right machinery that allows you to embroider the items you plan to offer in a timely manner.
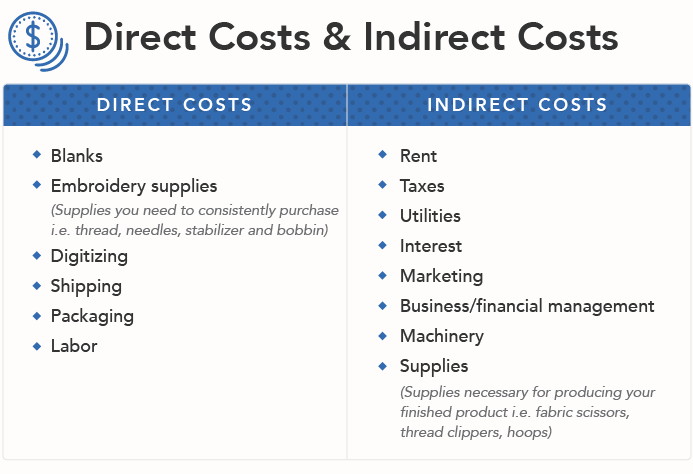
Step #3: Figure out your business costs

After you’ve chosen the right tools, you should be able to closely estimate the cost of running your business.
In business, there are generally two types of costs: direct costs and indirect costs.
Indirect costs are usually fixed costs that remain the same each month, such as rent.
Meanwhile, direct costs usually vary each month, as they are directly tied to production. This means, these costs will vary based on how many orders you receive.
In the embroidery business, direct costs like stabilizer, thread and bobbin are inexpensive compared to other businesses.
However, be mindful of other costs many don’t consider, such as the cost of digitizing, labor, marketing and packaging.
Step #4: Register your business

Next, you’ll need to register your business. As a business owner, you’ll get access to benefits such as wholesale prices and tax-free purchases on items you plan to resell. The exact steps in the process will vary by state, but generally, for the embroidery business, you’ll need to do the following:
- Start by filing for an EIN (Employer Identification Number) on www.irs.gov
- File for articles of incorporation within your state.
- Turn to your local government to determine resale licensing regulations and any permits you may need to get a resale certificate within your business location. (You will need this resale certificate in order to get access to wholesale prices in some stores.)
Step #5: Stock up on materials

One of the main questions embroiderers pose when starting a business is how to determine how much stock to have on-hand. Some embroidery machines include an assortment of startup materials that can get you through your first order or two. But during that time, take the time to stock up on thread, needles, stabilizer and blanks so you can start your orders as soon as you receive them.
But how do you determine how much to purchase?
Some embroiderers choose to order the merchandise they need after they’ve already received an order. This helps take the financial risk of overstocking off of your business.
The only problem?
This can drastically increase turnaround times and can even lead your customer elsewhere.
However, if you’re embroidering on the side, this approach may work for you. Some embroiderers start off small and don’t have the resources to invest in large quantities of various items. If that’s the case, stock up on the basics and listen to your customers as you go.
At first, you may spend a little more on shipping if you receive a rush order you need to fulfill, but it may be less than the cost of overstocking a large quantity.
You can also get around this issue by finding wholesalers near you. That way, you can purchase in-person, or get faster shipping at reduced rates.
On the other hand, if embroidery is your main source of income you should definitely have your main offerings on-hand. Otherwise, you’ll end up spending a lot more in rush shipping, and you’ll pay higher costs for smaller quantities. You’ll also experience longer turnaround times than competitors who are fully stocked on blanks and materials.
As your business grows, you’ll know exactly what materials and blanks you’ll need to keep in stock depending on your order volume.
Step #6: Create a pricing structure

Most embroiderers we know don’t have a standard price sheet because the price of each garment depends on the design the customer wants embroidered.
Because of the nature of this service, you need to determine a pricing structure to follow every time you quote a customer.
Click here to learn the best practices when pricing your embroidery work.
Many embroiderers price their work with a simple formula of $1 per 1,000 stitches plus the cost of the garment. While this may work in some cases, it is not accurate in other cases.
Sure; you can easily charge $12 for a $5 polo with $7,000 stitches on it, but what happens if your customer wants a larger design on a pillowcase, perhaps?
If your pillowcase’s design is 75,000 stitches, your pillowcase costs $5, and the artwork costs $10, would anyone pay $90 for an embroidered pillowcase?
Probably not.
Therefore, it’s best to determine a target profit you want to make per hour and price your item based off your raw costs and the time it takes you to complete the project.
However, be mindful not to underprice your work, as this stitch count rule can also work against you.
For instance, some customers may bring in their own garment and ask you to embroider it. If you give them a flat fee of $1 per 1,000 stitches, this pricing does not take into account the special considerations necessary to embroider this project.
For instance, some materials need to be embroidered at slower speeds and some designs have many color changes, increasing the time needed to complete the item.
For that reason, it’s important to calculate all your costs and include labor into your pricing structure, especially for larger orders.
For an in-depth look into how to price your items, click here to discover “The #1 Factor in Determining Profitability.” In this webinar, you’ll learn why it’s important to base your pricing off of this key component.
Step #7: Create an online presence

Last, it’s time to get digital.
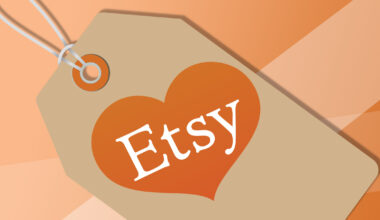
First off, you’ll need to determine what your point of sale will be. Will you be selling online or in-person? If you’ll be selling online, you’ll have several quick and easy options, such as Shopify for creating your own online store or Etsy for listing your products online.
Whether or not you’re planning to sell in person or online, you’ll need to set up a social media presence.
In the apparel business, social media is the best way to market your services and showcase your work. Rest assured, before someone buys from you in the apparel business, they have most likely visited your social media. When setting up your social media, be sure to list your business’ contact info on your bio and provide plenty of photos of samples for future customers to see.
You’ll also need to list your business on Google, and make sure your contact info and address are up-to-date. Listing your business on Google is free and will help customers who are searching for embroidery services in your area find you.
Listing your business on Google also gives you a reliable platform for happy customers to leave reviews. Not only do potential customers trust Google reviews more than reviews on your website, but the more reviews your business receives on Google, the higher your chances are of being found on Google by new customers.
SO WHAT’S NEXT?
Now that you’re familiar with the seven crucial steps you need to take before getting started in the embroidery business, it’s time to put this insider info to good use.
Although jumping into a new business or hobby can be intimidating, you’d be surprised how many people like you got started with little to no embroidery (or business) experience.
In an effort to capture what it’s like to build an embroidery business, we interviewed 4 crafters and entrepreneurs who turned into embroidery business pros. In these exclusive video interviews, they each shared…
- How they got started in the embroidery business
- Where they find their customers
- The types of embroidery projects they create
- Their best tips for startup businesses
- And so much more!

Click here to see how these everyday folks transitioned into the embroidery business seamlessly.
After all, what better way to get started than to see what the pros are doing?
The #1 Factor in Determining Profitability: How to price for maximum profit in the embroidery business
Are you an entrepreneur, fashion lover, or embroidery enthusiast interested in starting or growing a profitable embroidery business? Do you want to be successful?
To guarantee maximum profit in your embroidery business, we’ve put together a webinar discussing the #1 factor in determining profitability. You will learn everything from achieving optimal profit margins for your products to common myths that are costing you money.